How to Grow Hydroponic Microgreens at Home
We may earn a commission for purchases made using our links. Please see our disclosure for more details.
Want to grow something fresh at home without dragging in bags of soil or waiting months to harvest? Hydroponic microgreens are a great place to start. They grow fast, fit on a countertop, and give you crisp, flavorful greens in about one to two weeks.
In this guide, I’ll walk you through the simple way to grow hydroponic microgreens at home, including what supplies you need, which seeds are easiest, and how to avoid the little mistakes that can ruin a tray.
What Are Hydroponic Microgreens?
Microgreens are young edible seedlings harvested after the first true leaves begin to appear. They sit between sprouts and baby greens in the plant growth timeline.
Hydroponic microgreens grow without soil. Instead, the seeds sit on a clean growing medium such as hemp mats, coco coir mats, jute mats, or reusable mesh trays. The roots take up water and, in some cases, a mild nutrient solution.
Most beginners start with water only because many microgreen seeds contain enough stored energy for early growth. However, some crops may benefit from light feeding, especially if you grow them past the usual harvest window.
Why Grow Microgreens Hydroponically?
Hydroponic growing keeps things tidy. There is no potting soil on the counter, no mud in the sink, and no need to pull weeds.
It also gives you more control. You decide how much light the greens receive, how moist the root zone stays, and when to harvest. This control matters because microgreens are delicate after cutting. A Journal of Food Science review explains that microgreens can wilt and deteriorate quickly after harvest, so growing them at home lets you cut only what you need.
Hydroponics also fits small spaces. If you want to understand larger indoor setups later, this guide to hydroponic growing systems is a helpful next step because it explains common system types, including beginner-friendly options.
Supplies You Need
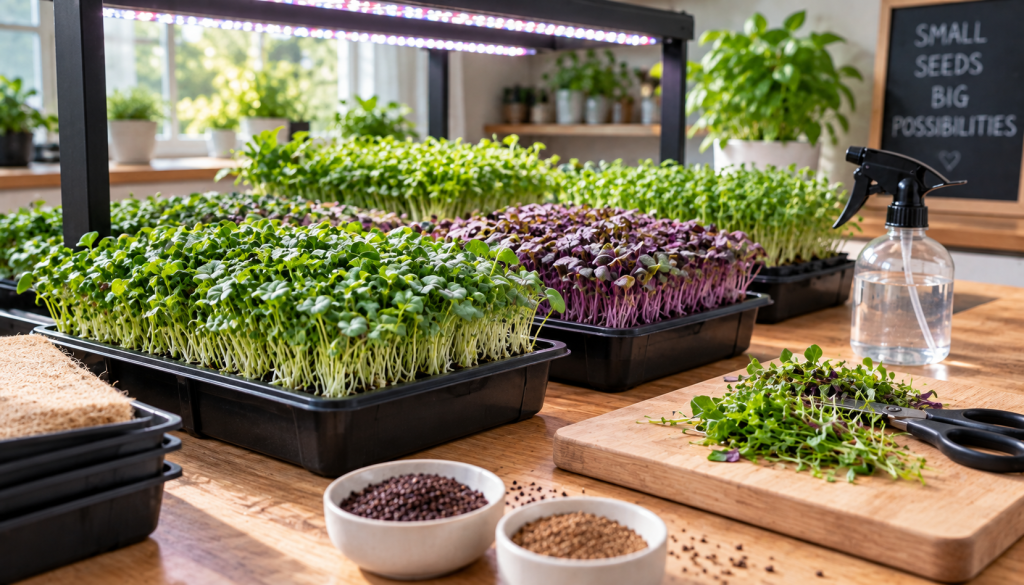
You only need a few simple items to grow hydroponic microgreens at home.
Shallow Trays
Use a tray with drainage holes and a solid tray underneath. This makes watering easier and keeps the growing area cleaner.
Growing Medium
Choose a medium that holds moisture and supports the roots. Hemp mats, coco coir mats, jute mats, and cellulose mats all work well.
Microgreen Seeds
Use untreated seeds labeled for microgreens or sprouting. Avoid coated or chemically treated garden seeds.
Spray Bottle
A spray bottle helps keep seeds lightly moist during germination without flooding the tray.
Grow Light
A small grow light helps if your window light is weak or inconsistent. It also keeps microgreens from growing tall, pale, or leggy.
Best Microgreens to Start With
Some seeds behave better than others. For your first few trays, choose fast and forgiving crops.
Radish is one of the easiest. It germinates quickly, grows with strong stems, and brings a peppery flavor.
Broccoli is another excellent choice. It grows evenly and works well in sandwiches and salads.
Pea shoots take a little more space, but they taste sweet and crunchy. Sunflower shoots also grow thick and satisfying, although they need soaking and better airflow.
Avoid tiny mucilaginous seeds like basil or chia at first. They form a gel coating when wet, which can frustrate beginners.
How to Start Growing Hydroponic Microgreens at Home
1. Soak larger seeds
Soak peas, sunflowers, and beets for 6 to 12 hours before planting. Small seeds like broccoli, radish, kale, and mustard usually do not need soaking.
After soaking, drain them well. Seeds should feel moist, not waterlogged.
2. Prepare the tray
Place your grow mat in the tray and wet it evenly. It should feel damp across the surface.
Pour off extra standing water. Too much water invites mold and weak stems.
3. Spread the seeds
Scatter seeds evenly across the mat. Aim for full coverage without stacking seeds on top of each other.
Crowding causes poor airflow. It also makes the tray more likely to smell sour or develop fuzzy growth.
4. Keep seeds covered during germination
Most microgreens germinate better in darkness. Cover the tray with another tray or a blackout lid for two to four days.
Check once daily. Mist lightly if the mat starts to dry.
5. Add light after germination
Once the seeds sprout and begin lifting the cover, move the tray under a grow light or near a bright window.
Keep the tray under light for roughly 12 to 16 hours daily so the seedlings can grow strong and evenly. Keep the light close enough to prevent stretching, but not so close that it heats the greens.
6. Water from the bottom
After germination, stop soaking the leaves from above. Add water to the bottom tray instead.
The grow mat will wick moisture upward. This keeps leaves drier and lowers the chance of mold.
7. Harvest at the right time
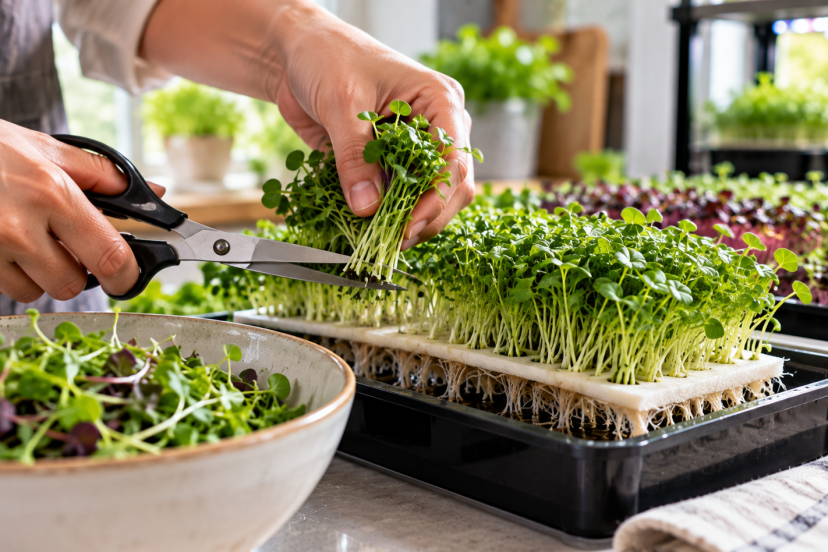
Most hydroponic microgreens are ready when they stand a few inches tall and show early true leaves.
Harvest them with sanitized scissors or a sharp kitchen knife. Cut just above the mat, then rinse gently and dry well before storing.
Do Hydroponic Microgreens Need Nutrients?
Many beginner trays grow fine with clean water only. The seed carries enough stored food to support the first stage of growth.
However, nutrients can matter when you grow larger microgreens, use low-mineral water, or extend the crop longer than usual. Research on Brassica microgreens found that nutrient solution strength and nitrogen form can affect yield and quality traits, which shows why feeding is worth testing once you understand the basics.
For home growers, start simple. Use water first. After a few harvests, try a very diluted hydroponic nutrient solution on one tray and compare the results.
Common Mistakes to Avoid
The biggest mistake is overwatering. Microgreens like moisture, but they hate sitting in stagnant water.
Poor airflow is another problem. If the tray stays too humid, mold can spread quickly. A small fan nearby can help, but do not blast the plants directly.
Also, avoid planting too thickly. Dense trays look impressive online, but crowded seedlings compete for air and light.
Finally, do not harvest with dirty scissors. Microgreens are eaten fresh, so clean tools and trays matter.
For family-friendly growing experiments, you may also enjoy this guide to hydroponic projects for kids, especially if you want to turn microgreens into a simple science activity at home.
Conclusion
Growing hydroponic microgreens at home is simple, practical, and surprisingly rewarding. Start with easy crops like radish, broccoli, or pea shoots, use clean trays, keep moisture steady, and give your greens enough light after germination. Once you get the rhythm, you can experiment with different mats, seed mixes, nutrients, and harvest times. You do not need a full indoor farm to enjoy fresh greens. One small tray on a kitchen counter can teach you a lot about hydroponics and give you something fresh to eat within days.
FAQs
1. Are hydroponic microgreens easy for beginners?
Yes. Hydroponic microgreens are beginner-friendly because they grow quickly and need only basic supplies. Start with radish or broccoli for the easiest first harvest.
2. Is soil necessary for growing microgreens?
Yes. You can grow microgreens on hemp mats, coco coir mats, jute mats, paper-based mats, or reusable mesh trays. The roots only need moisture, oxygen, and support.
3. Is a grow light required for microgreens?
Not always. A sunny window may work, but a grow light gives more consistent results. Use one if your greens stretch, lean, or look pale.
4. How long do hydroponic microgreens take to grow?
Depending on the seed type and growing conditions, microgreens are usually ready to cut within one to two weeks. Radish and broccoli grow fast, while peas and sunflowers may take slightly longer.
5. Why do my microgreens get moldy?
Mold usually comes from too much moisture, poor airflow, dirty trays, or overcrowded seeds. Water from the bottom, improve ventilation, and sanitize trays between batches.