How to Grow Hydroponic Spinach at Home
We may earn a commission for purchases made using our links. Please see our disclosure for more details.
Fresh spinach is useful in everything from salads and smoothies to soups and stir-fries. Unfortunately, store-bought leaves often wilt before you finish the bag. Growing hydroponic spinach at home gives you a steady supply of crisp leaves without needing a garden bed—or even a backyard.
Spinach grows quickly, needs relatively little space, and responds well to the controlled conditions of an indoor system. It can be slightly more demanding than lettuce because it prefers cool temperatures, but you do not need professional equipment to succeed. A simple deep water culture container, a small grow light, and careful monitoring can produce excellent results.
Why Grow Spinach Hydroponically?
A hydroponic system supplies water and minerals directly to the plant’s roots. Spinach does not need to search through soil for moisture, so it can put more energy into producing tender leaves.
Growing indoors also lets you avoid many outdoor problems, including weeds, soil-borne diseases, slugs, and unpredictable rainfall. You control the temperature, light, and feeding schedule throughout the crop.
Spinach is particularly valuable for cool-season indoor growing. We include it among the best winter-hardy plants for hydroponic gardens because it performs well at temperatures that many fruiting crops find too cool.
Choose the Right Hydroponic System
Several systems can support spinach, but some are easier to manage at home.
Deep Water Culture
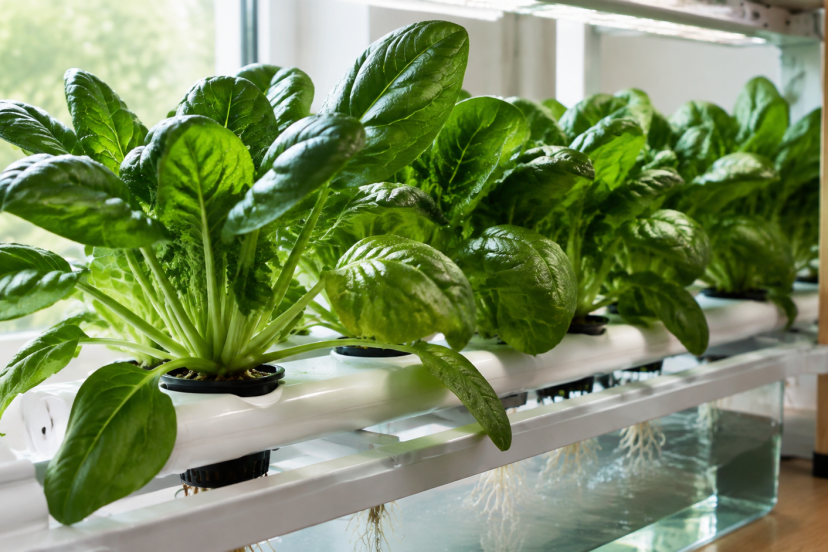
Deep water culture, or DWC, holds plants above a nutrient reservoir while their roots extend into the water. A pump pushes air through an air stone, supplying dissolved oxygen to the nutrient water.
DWC is affordable, uncomplicated, and suitable for a small group of mature plants. Beginners can learn more about its setup and oxygen requirements in this deep water culture guide.
Kratky Method
The Kratky method resembles DWC but does not use an air pump. As the nutrient level drops, part of each root system remains exposed to oxygen.
This passive approach can work for baby spinach. However, it leaves less room for error during warm weather because still, warm water contains less dissolved oxygen.
Nutrient Film Technique
An NFT system circulates a shallow stream of nutrient solution past the roots. It works well for producing several plants in a narrow space, although pumps, channels, and plumbing make it more complicated.
For your first crop, a small DWC container usually offers the best balance of simplicity and control.
Gather Your Supplies
You do not need an elaborate indoor farm. A basic hydroponic spinach setup requires:
- An opaque reservoir with a lid
- Two- or three-inch net pots
- For DWC, gather an air pump, flexible tubing, and an air stone
- Rockwool cubes, coco plugs, or another seed-starting medium
- Complete hydroponic nutrients
- Spinach seeds
- A pH meter or test kit
- An EC meter
- A full-spectrum LED grow light
- A timer
- A small fan for air circulation
Choose an opaque reservoir because light entering the nutrient solution encourages algae. Clean every reusable component before planting.
Select and Germinate Spinach Seeds
Compact, slow-bolting varieties are good choices for indoor growing. Consider cultivars such as Space, Corvair, Seaside, or Bloomsdale. Seed availability varies, so check whether the variety suits baby-leaf or full-size harvesting.
Spinach seeds sometimes germinate unevenly, especially when they become warm. Soak them in cool water for four to six hours, then place one or two seeds in each damp starter cube. Keep the cubes moist but never submerged.
Keep the temperature between 65 and 70°F (18–21°C) while the seeds sprout. The University of Georgia’s hydroponic spinach guidance identifies this as the optimal germination range.
Most viable seeds sprout within 5–10 days. Once seedlings appear, give them gentle light immediately so they remain short and sturdy.
Transplant the Seedlings
Move seedlings into the main system after they develop two or three true leaves and roots begin emerging from the starter cubes. This usually takes around two weeks.
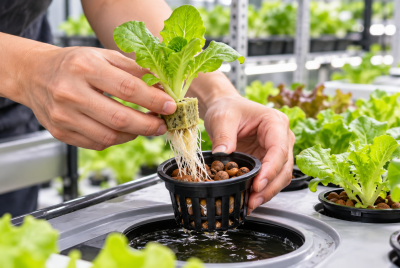
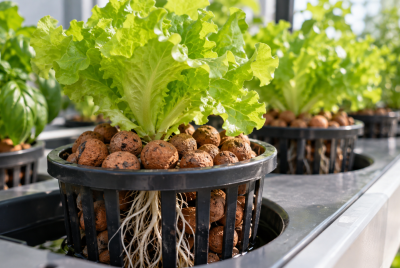
Place each cube in a net pot and surround it with rinsed clay pebbles if it needs extra support. Set the water level high enough to moisten the bottom of the cube at first. As roots reach the solution, lower the level slightly to create a humid air gap.
Space plants approximately six inches apart for baby leaves and eight inches apart for larger plants. Crowded spinach holds moisture between its leaves, which increases the chance of fungal trouble.
Maintain the Best Growing Conditions
Successful hydroponic spinach depends more on consistency than complicated techniques.
pH and Nutrient Strength
Keep the nutrient solution near pH 5.8–6.5. Within this slightly acidic range, spinach roots can access essential minerals efficiently.
A practical EC target is about 1.5–2.0 mS/cm. Begin near the lower end for young seedlings, then increase the strength gradually as the plants mature. Always follow the nutrient manufacturer’s mixing order and never combine concentrated nutrient parts directly.
Research published in HortScience found that nutrient concentration and solution pH influence spinach yield and mineral content. This reinforces the value of measuring the solution instead of estimating it by appearance.
Temperature
Keep the air around 60–70°F (16–21°C) when possible. Spinach can grow outside this range, but prolonged heat encourages premature flowering, known as bolting. Bolted leaves often taste bitter.
Keep the reservoir cool as well. The Cornell hydroponic baby spinach handbook recommends water temperatures of 50–68°F (10–20°C) for its production system.
Light
Provide roughly 12–14 hours of light daily, followed by a dark period. Position the fixture according to its manufacturer’s instructions.
Pale, stretched seedlings usually need stronger or closer light. Brown or bleached patches may indicate excessive intensity or a fixture positioned too close to the leaves.
Airflow and Oxygen
Run the DWC air pump continuously. Healthy roots need oxygen even though they sit in water. A gentle fan above the plants also strengthens growth and helps moisture evaporate from crowded foliage.
Follow a Simple Maintenance Routine
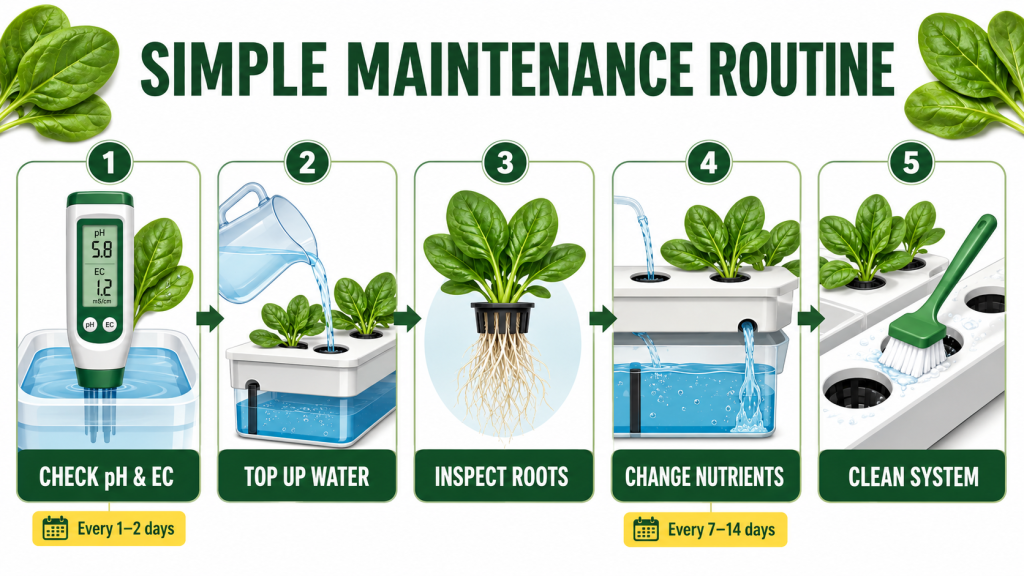
Check pH, EC, temperature, and water level every day or two. Small systems change faster than large reservoirs, particularly once mature plants begin drinking heavily.
Between reservoir cleanings, restore the water level with fresh, pH-adjusted water. Mix a completely new nutrient solution every one to two weeks. While changing it, inspect the roots and remove any dead plant material.
Healthy roots generally look cream-colored or white and smell fresh. Brown, slimy roots with an unpleasant odor suggest low oxygen, warm water, or microbial growth. Clean the reservoir, add fresh solution, improve aeration, and remove badly damaged plants.
Harvest Hydroponic Spinach
Baby spinach may be ready 25–35 days after germination. Full-size leaves often need 35–50 days, depending on the variety and conditions.
For repeat harvests, remove the largest outer leaves with clean scissors while leaving the crown and smaller center leaves intact. Take no more than one-third of the foliage at once.
Alternatively, cut the entire plant just above its base. Harvest in the morning or after the dark cycle, when the leaves feel crisp. Wash them in cool water, dry them thoroughly, and refrigerate them in a breathable container.
Common Problems and Solutions
Yellow leaves: Check pH before adding more fertilizer. Incorrect pH can prevent nutrient uptake even when the reservoir contains enough minerals.
Brown leaf edges: Lower excessive EC, check for heat stress, and improve airflow around the plants.
Slow growth: Confirm that the roots receive oxygen and the light runs for a consistent daily period.
Algae: Block light from the reservoir, cover unused openings, and clean affected surfaces.
Bolting: Reduce air and water temperatures and choose a slow-bolting cultivar for the next crop.
Root rot: Replace the solution, sanitize the reservoir, increase aeration, and keep the water cooler.
Recommended Products for Hydroponic Spinach
These products cover the main jobs in a compact home setup. Check dimensions and system compatibility before ordering.
- DWC Hydroponic System – This all-in-one bucket kit includes core DWC components, making it a convenient starting point for a few full-size plants.
- General Hydroponics FloraSeries Nutrient Set – The three-part formula lets growers adjust nutrition as plants move from seedlings to mature leafy growth.
- VIVOSUN Digital pH and EC Meter Kit – Separate pH and EC/TDS pens make it easier to monitor acidity, nutrient strength, and solution temperature.
- VIVOSUN T5 Full-Spectrum Grow Lights – These compact LED strips suit seed-starting shelves and small indoor leafy-green gardens.
- ORIMERC Three-Inch Net Pots – The slotted cups hold starter plugs while allowing roots to reach the nutrient solution.
Conclusion
Growing hydroponic spinach at home becomes straightforward once you control the crop’s main needs: cool temperatures, reliable oxygen, moderate nutrients, and consistent light. Start with a small DWC system, record your pH and EC readings, and harvest the outer leaves regularly. That simple routine can give you cleaner, fresher spinach throughout much of the year—without soil, weeds, or a large growing area.
FAQs
When can you harvest hydroponically grown spinach?
You can often begin harvesting baby leaves within 25–35 days. Larger leaves generally take 35–50 days, depending on temperature, light, and variety.
What pH is best for hydroponic spinach?
Aim for a pH between 5.8 and 6.5. Test regularly because plant uptake, evaporation, and added water can shift the reading.
How many hours of light does spinach need?
Indoor spinach generally performs well with 12–14 hours of consistent light each day. It also needs a nightly dark period.
Will spinach produce new leaves after harvesting?
Yes. Remove mature outer leaves and protect the central crown. The plant should continue producing until heat, age, or stress causes it to bolt.
What causes a bitter taste in hydroponic spinach?
Heat and bolting are common causes. Keep the air and nutrient solution cool, maintain steady moisture, and harvest leaves before a flower stalk develops.