Ebb and Flow Hydroponic System: Beginner’s Guide
We may earn a commission for purchases made using our links. Please see our disclosure for more details.
If you’ve tried other hydroponic systems and struggled with root rot or inconsistent growth, there’s a good chance your roots weren’t getting enough oxygen between waterings. The ebb and flow hydroponic system fixes that by flooding your grow tray with nutrient-rich water on a timer, then draining it completely so roots can breathe before the next cycle. It’s one of the most beginner-friendly methods out there. It works with almost any crop, and once you’ve got the timer and nutrients dialed in, it pretty much runs itself. This guide covers how it works, how to set one up, and which products are worth to consider.
What Is an Ebb and Flow Hydroponic System?
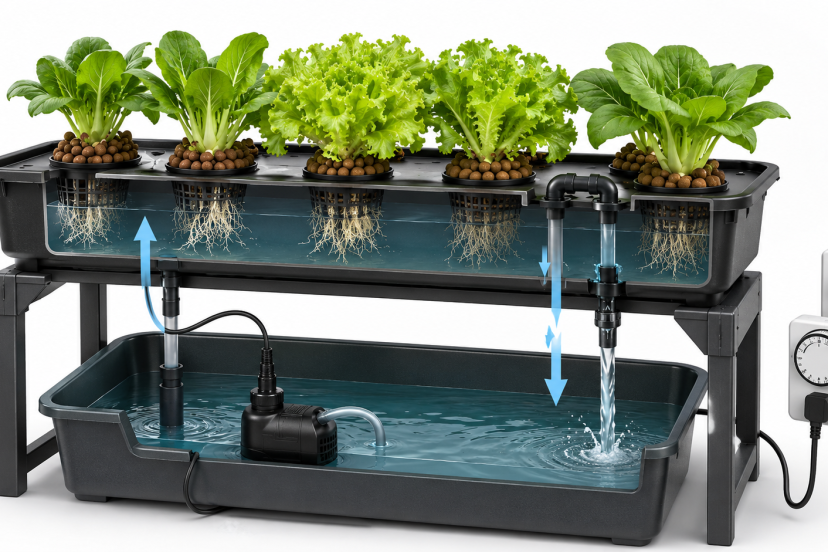
Flood and drain, the other name most growers use for this system, is honestly one of the easiest hydroponic methods to wrap your head around. A timer triggers a pump that floods your grow tray with nutrient-rich water. Once the tray fills to a set level, the pump shuts off and gravity pulls the water back down into the reservoir below. That cycle repeats a few times a day, and your plants get fed every single time.
What makes this system work so well is what happens between floods. Most people assume plants just need water — but roots also need oxygen to absorb nutrients efficiently. When roots sit in water for too long, oxygen gets cut off, growth slows, and root rot sets in. The drain phase solves that. As the tray empties, fresh air moves into the growing medium and reaches the root zone directly.
That alternating rhythm of wet and dry is what separates ebb and flow from systems like deep water culture, where roots stay submerged around the clock. Plants grown in ebb and flow setups tend to develop stronger, more extensive root systems because they’re essentially conditioned to make the most of each flood cycle. More root surface area means better nutrient uptake, which shows up in faster growth above ground.
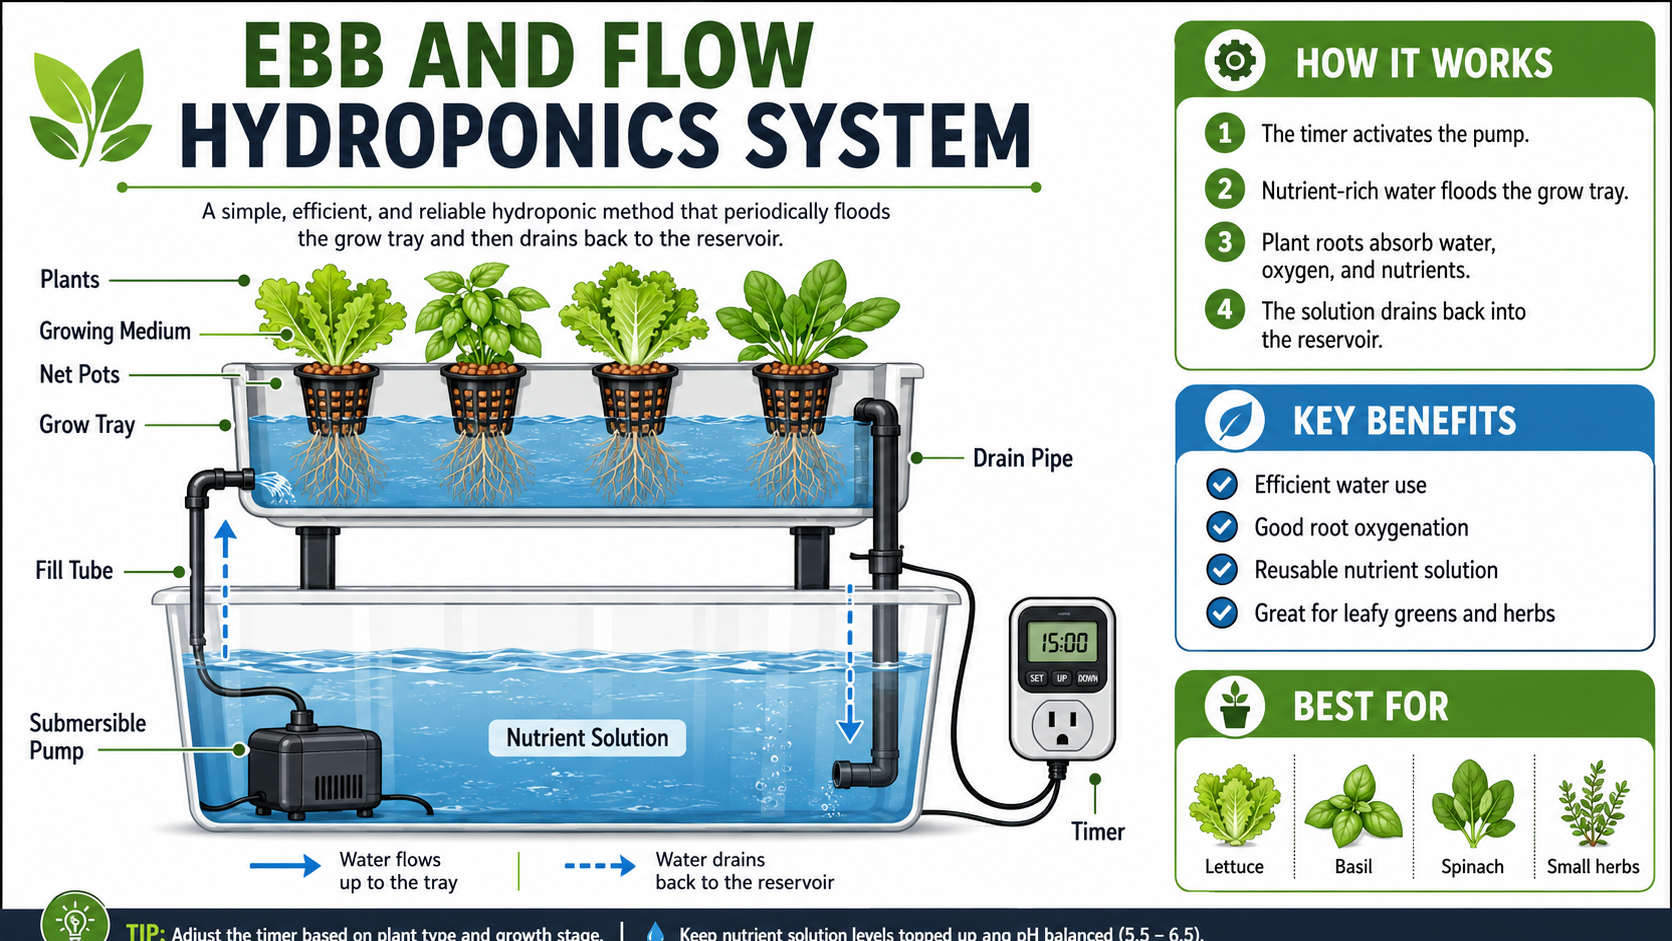
The Core Components
Grow Tray
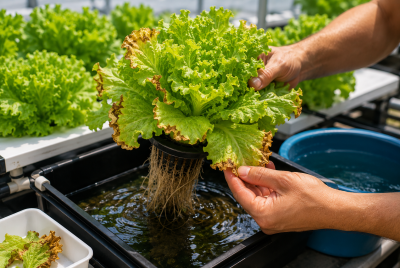
This is where your plants live, sitting in net pots filled with clay pebbles, rockwool, or perlite. It needs to be level and watertight. Uneven trays cause uneven flooding — simple as that.
Reservoir
Directly underneath the grow tray, the reservoir stores the nutrient solution your plants feed from during each flood cycle. Bigger is better for beginners. A larger volume keeps pH and nutrient concentration more stable, so you’re not constantly tweaking things.
Pump and Timer
A submersible pump on a digital timer handles everything. Most growers run 3 to 4 flood cycles per day. Clay pebbles dry fast, so they may need more cycles. Rockwool holds moisture longer and needs fewer.
Overflow and Drain Fittings
These two fittings are small but critical. The overflow fitting controls the max water depth in your tray — usually 1 to 2 inches. The drain fitting lets water flow back to the reservoir when the pump stops. Get these installed correctly before you run a single cycle.
Why It Works Well for Beginners
It’s forgiving. The growing medium holds some moisture between floods, so a brief power outage won’t kill your plants the way it would in an NFT system.
It handles a lot of different crops. Lettuce, basil, strawberries, peppers — this system isn’t picky. Research published in HortScience confirms that flood-and-drain systems support strong, consistent yields when nutrient timing is dialed in.
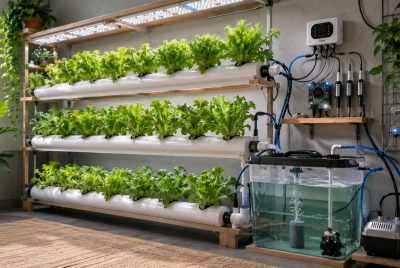
It scales easily. Start with one tray and a small reservoir. Expand when you’re ready. The same basic setup is used in commercial operations, just bigger.
It runs itself. Once the timer and nutrients are set, there’s not much daily work involved.
How to Set Up Your System
Step 1: Pick a Reservoir Size
A 10- to 20-gallon reservoir works for most beginners. Larger volume means more stable conditions.
Step 2: Position the Grow Tray
Place the tray directly above the reservoir on a level surface. Even a slight tilt will cause water to pool unevenly.
Step 3: Install the Fittings
Attach the fill fitting (pump side) and overflow/drain fitting to the tray. Double-check both are sealed before adding water.
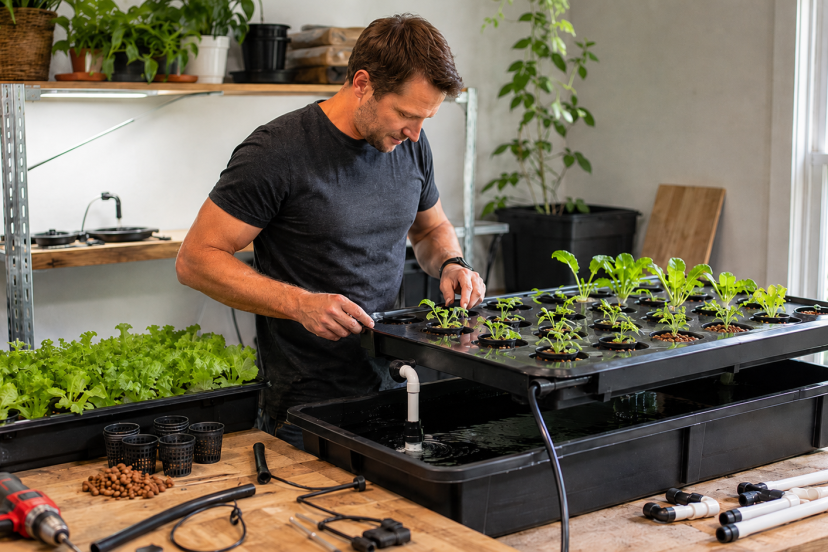
Step 4: Add Plants and Medium
Fill net pots with your growing medium and place seedlings or clones into the tray. Make sure the medium is moist before the first flood.
Step 5: Set the Timer
Start with 3 to 4 floods per day — morning, midday, and early evening works for most setups. Watch how fast your medium dries and adjust from there.
Step 6: Mix Your Nutrients
Follow the manufacturer’s feeding chart. Keep pH between 5.5 and 6.5 and check EC levels regularly. These two numbers tell you almost everything about your solution’s health.
If you grow outdoors or in a seasonal garden alongside your hydroponic setup, this guide on winter food gardening covers nutrient strategies that translate well across both methods.
What to Avoid When Running an Ebb and Flow System
- Too many flood cycles. Over-saturating the root zone is a real risk. More floods ≠ faster growth.
- Skipping pH checks. Nutrient lockout almost always comes back to pH drift. Check it daily until things stabilize.
- Using soil. It breaks apart during flooding and clogs your fittings. Use inert media only.
- Warm reservoir water. Anything above 72°F (22°C) promotes root rot. Keep it between 65–68°F.
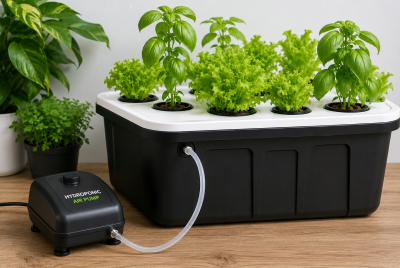
5 Products Worth Buying
1. Hydroponic Flood Tray (2-Pack)
BPA-free, durable, and easy to set up. The lip design handles runoff cleanly. A solid starting tray for herbs and leafy greens.
2. Active Aqua Submersible Water Pump (400 GPH)
Quiet, energy-efficient, and adjustable. Handles most small-to-mid-size ebb and flow setups reliably.
3. General Hydroponics Flora Series Nutrient Kit
The three-part system (Micro, Gro, Bloom) lets you adjust your feed formula by growth stage. Widely used and well-documented across hobbyist and commercial grow guides alike.
4. VIVOSUN Digital Timer (Dual Outlet)
Programmable down to the minute with two outlets — handy if you’re also timing grow lights. Straightforward and dependable.
5. Hydroponics 2-Inch Net Cups (Pack of 50)
Sturdy, reusable, and mesh-sided for strong root development. Pairs well with clay pebbles and fits most standard flood trays.
How Pump Timing and Trough Design Affect Your Results
Most beginners set a timer and call it done. That works — but two studies suggest small adjustments can push your system noticeably further.
A 2022 paper in IOP Conference Series found that regulating pump cycles in ebb and flow systems reduces unnecessary pump operation and lowers energy consumption without affecting plant health. Practically, your timer settings directly impact how consistently roots get oxygen between floods — not just your electricity bill.
Trough shape matters too. A study in Computers and Electronics in Agriculture (2022) tested three trough designs and found that U-type troughs achieved 1.38–1.60× higher irrigation efficiency than standard flat designs, at roughly 19% of the energy cost. If you’re building DIY, a rounded trough bottom is worth the extra thought.
Both studies make the same point: the ebb and flow system performs better than most beginner setups actually allow.
How It Compares to Other Systems
| System | Complexity | Root Oxygen | Best For |
| Ebb & Flow | Low–Medium | High | Beginners, diverse crops |
| DWC | Low | Medium | Leafy greens, fast growers |
| NFT | Medium | Very High | Lettuce, herbs |
| Drip System | Medium–High | High | Tomatoes, peppers |
| Aeroponics | High | Highest | Advanced growers |
Ebb and flow sits in the middle — easy enough for beginners, capable enough to grow almost anything well.
Conclusion
The ebb and flow hydroponic system earns its reputation because the fundamentals are sound. Roots get water, then oxygen, on a reliable cycle that closely mirrors how plants grow in nature. Set it up right, keep your pH in range, and the system largely runs itself. What the research adds to that picture is worth remembering: smarter pump scheduling and better trough design push results further than most growers expect, and water savings compared to soil growing are substantial. Whether you’re growing herbs on a shelf or scaling up to a full grow tent, the ceiling on what this system can do is higher than it looks at first. Start simple, pay attention to the details, and the results will follow.
FAQs
How often should I flood my ebb and flow system?
Start with 3 to 4 cycles per day. Keep an eye on how quickly your growing medium dries out between floods and use that as your guide for tightening or loosening the schedule. Clay pebbles may need up to 6 cycles; rockwool usually needs 2 to 3.
What plants grow best in this system?
Lettuce, basil, spinach, tomatoes, peppers, and strawberries all do well. It’s one of the most crop-flexible systems for home growers.
When should I replace the water in my hydroponic reservoir?
Do a full swap every 7 to 14 days. Between changes, top off with plain pH-adjusted water to replace what’s been absorbed or evaporated.
Can I use soil in an ebb and flow hydroponic system?
No. Soil breaks apart during flood cycles and clogs your pump and fittings. Stick to clay pebbles, rockwool, or perlite.
What pH should my nutrient solution be?
Keep it between 5.5 and 6.5. Check daily for the first few weeks until you get a sense of how fast your solution drifts.