How to Use Rockwool Cubes for Hydroponic Growing
We may earn a commission for purchases made using our links. Please see our disclosure for more details.
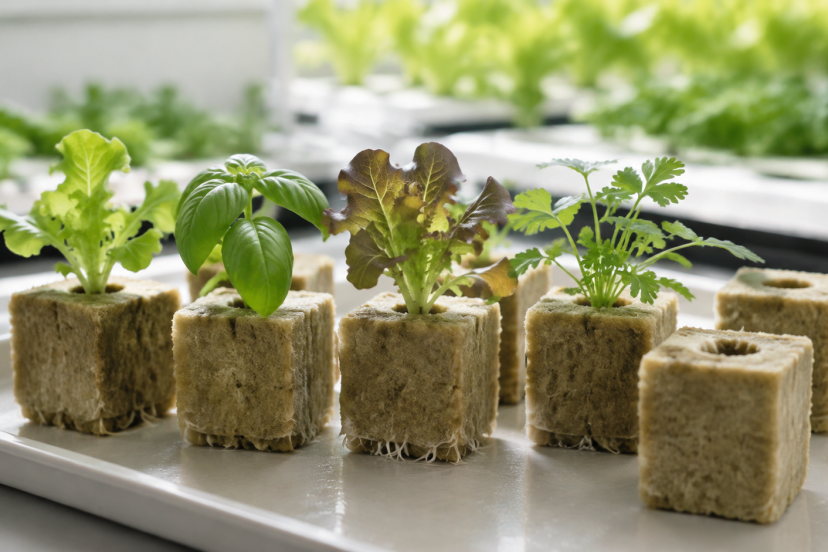
Starting seeds for a hydroponic garden can feel surprisingly delicate. Young plants need steady moisture, access to oxygen, and enough support to develop roots without sitting in soggy soil. Rockwool cubes make that balance easier to maintain. Their fibrous structure holds water while leaving small air spaces around the roots. They also fit neatly into net pots, larger grow blocks, and several popular hydroponic systems.
However, rockwool requires a little preparation. You need to manage its moisture carefully and check whether your chosen product needs pH conditioning. This guide walks you through the entire process, from opening the package to moving an established seedling into your system.
What Are Rockwool Cubes?
Rockwool, also called stone wool or mineral wool, begins as rock that manufacturers melt and spin into thin fibers. They press those fibers into plugs, cubes, blocks, and slabs for soilless growing.
Unlike soil or compost, rockwool does not provide nutrients. Its main jobs are to support the plant, hold water, and maintain air space around developing roots.
A scientific review of the hydroponic rockwool root environment describes rockwool as a useful root anchor that provides access to both air and moisture. This combination explains why commercial growers frequently use it to propagate vegetables, herbs, and ornamental plants.
Rockwool works especially well for:
- Lettuce and other leafy greens
- Basil, cilantro, and similar herbs
- Tomatoes, peppers, and cucumbers
- Plant cuttings and clones
- Seedlings intended for deep water culture, drip, ebb-and-flow, or NFT systems
Never substitute building insulation for horticultural rockwool. Construction products may contain binders or other materials that were not designed for plant propagation.
Benefits and Drawbacks of Rockwool
The biggest advantage is consistency. Every cube has roughly the same shape and structure, making it easier to give a tray of seedlings similar treatment.
Rockwool also holds a generous amount of water. At the same time, its porous structure can retain air when growers irrigate it correctly. This helps young roots obtain moisture without remaining completely submerged.
Other advantages include:
- Clean and convenient handling
- Good physical support for seedlings
- Easy transfer into net pots
- No weed seeds
- Predictable moisture distribution
- Compatibility with automated irrigation
Rockwool is not perfect, though. It does not biodegrade like coco coir or compostable starter plugs. Oversaturated cubes may also restrict oxygen and encourage algae or unhealthy roots.
Dry mineral fibers can irritate the skin and eyes. The NIOSH Pocket Guide for mineral wool fiber identifies skin, eye, and respiratory irritation as possible exposure effects. Wear gloves, work in a ventilated place, and avoid tearing dry cubes apart.
For a broader comparison, see this guide to choosing a hydroponic growing medium.
Choose the Right Rockwool Cube Size
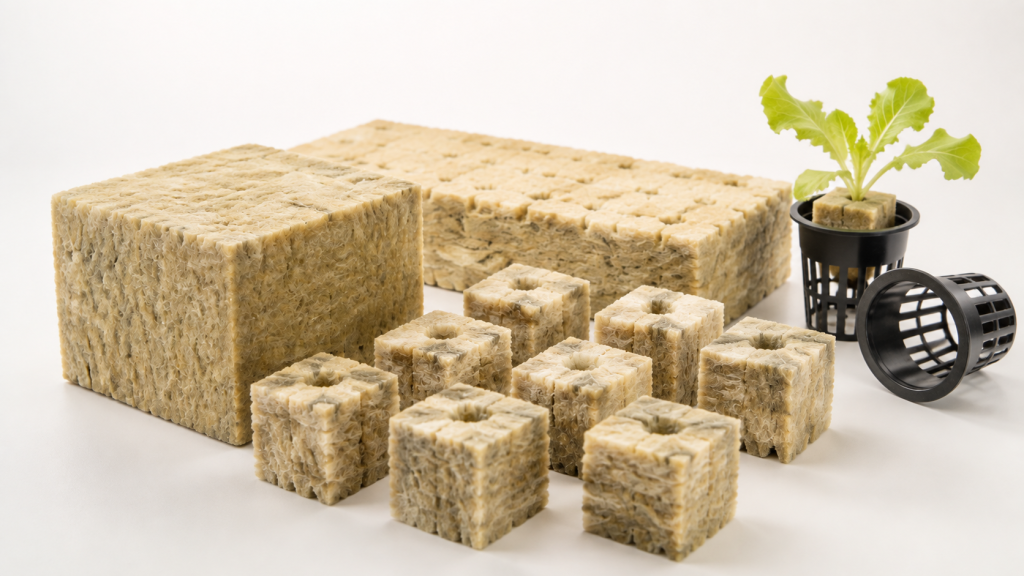
Small starter plugs or cubes measuring about 1 to 1.5 inches work well for most seeds. They fit standard propagation trays and can later sit inside larger cubes or net pots.
Two-inch cubes provide more room for seedlings that will remain in the propagation area longer. They also suit larger seeds and some cuttings.
Larger blocks and slabs support mature fruiting plants, but most home growers do not need them for germination. Check your net-pot diameter before buying cubes so the selected size fits securely without being compressed.
Choose horticultural cubes with preformed planting holes. Loose or damaged cubes are harder to irrigate evenly and may shed more fibers.
Gather Your Supplies
You do not need an elaborate propagation station. A few basic items will make the process much more reliable:
- Horticultural rockwool cubes
- Clean water
- Calibrated pH meter
- Hydroponic pH adjuster
- Seeds or healthy plant cuttings
- Shallow propagation tray
- Humidity dome
- Clean tweezers
- Gentle hydroponic nutrient
- Grow light
- Gloves
Clean the tray and tools before starting. Rockwool may arrive relatively clean, but dirty hands, old plant matter, and unwashed equipment can introduce mold or pathogens.
Prepare Rockwool Cubes Before Planting
First, read the product label. Traditional rockwool products may start alkaline and require conditioning, while some modern horticultural cubes arrive stabilized or ready to use. Follow the manufacturer’s directions instead of automatically applying the same soaking routine to every brand.
If conditioning is required, fill a clean container with water and adjust it to approximately pH 5.5 to 6.0. Place the cubes in the solution for the recommended period, which commonly ranges from several minutes to an hour.
The target matters because pH influences nutrient availability. According to Oklahoma State University’s hydroponic pH and electrical conductivity guide, nutrient solutions for soilless growing generally perform best between pH 5 and 6, with 5.5 commonly used as a target. This range helps keep nutrients available to plant roots.
Take the cubes out of the solution and let the extra water drip away on its own. Do not squeeze them. Compression damages the internal air spaces that make rockwool useful.
How to Start Seeds in Rockwool Cubes
Place the conditioned cubes in a clean propagation tray with their planting holes facing upward.
Drop one seed into each hole. You can plant two seeds when germination rates are uncertain, but you will need to remove the weaker seedling later. Use tweezers for small seeds so they do not stick to wet fingers.
The correct depth depends on the crop. As a general guide, position the seed about two times as deep as its width. Very small seeds often need only light coverage.
Gently pinch a small amount of fiber over the opening or cover it with a tiny piece of unused rockwool. Do not pack the hole tightly.
Cover the tray with a humidity dome and place it under suitable light. Warm-season crops such as peppers and tomatoes may benefit from a seedling heat mat. Lettuce usually prefers cooler conditions.
For more propagation advice, read these practical tips on starting seeds for hydroponics.
How to Root Cuttings in Rockwool
Rockwool cubes also provide a stable environment for plant cuttings. Begin with a healthy parent plant and sanitize your cutting tool.
Make a clean cut below a node and remove leaves from the lowest section of the stem. If appropriate for the plant, dip the stem into rooting gel before inserting it into the cube.
The planting hole should hold the stem upright without crushing it. Keep humidity high during the first few days because an unrooted cutting loses moisture through its leaves.
Provide gentle light rather than intense direct light. Gradually increase airflow after the cutting begins to recover. New leaf growth and visible roots usually indicate that the cutting has established itself.
Watering and Feeding Rockwool Seedlings
One of the easiest mistakes is watering on a fixed daily schedule. Instead, check the cubes by sight and weight. A cube that feels light and appears paler usually needs water. A dark, heavy cube probably contains enough.
Add small amounts around the cube rather than flooding the entire tray. Never leave the cubes sitting in deep standing water.
Seeds contain enough stored energy for their earliest growth. Once seedlings develop their first true leaves, begin feeding them with a weak hydroponic nutrient solution. Start below the full-strength recommendation and increase gradually as the plants grow.
Monitor pH after mixing nutrients because fertilizers can change the reading. If possible, measure electrical conductivity as well. A high nutrient concentration can damage young roots even when the pH looks correct.
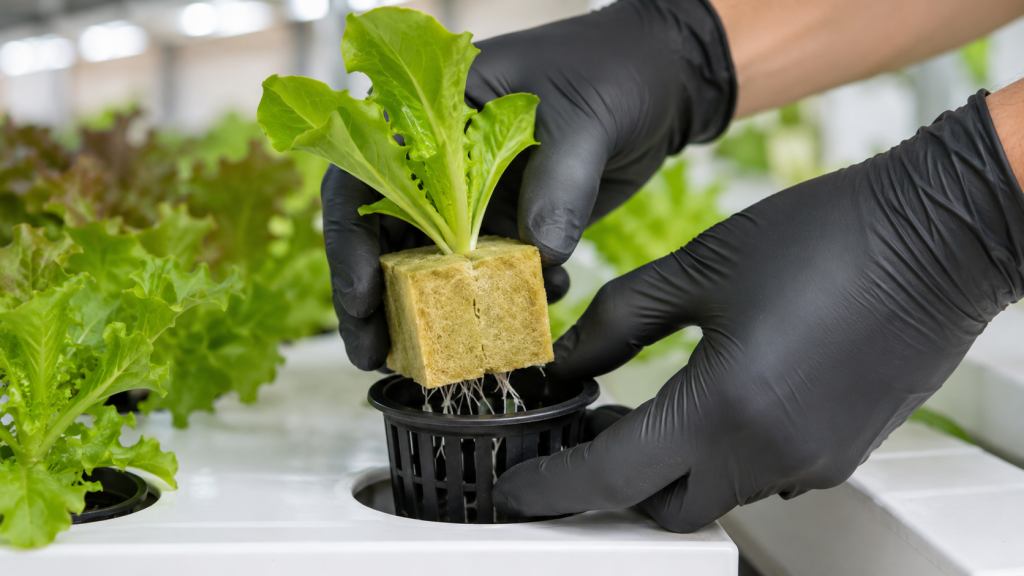
Transplanting Rockwool Into a Hydroponic System
Wait until you see healthy roots emerging from the cube. The seedling should also have at least one or two sets of true leaves, depending on the crop.
Place the entire cube into a compatible net pot. Do not pull the seedling out or remove fibers from its roots. Add clean clay pebbles around the cube if you need more stability, but avoid crushing it.
In deep water culture, keep the initial water level close enough for rising bubbles or splashes to moisten the bottom of the cube. Do not submerge the entire cube. Once roots reach the solution, you can lower the water level to create an air gap.
In NFT systems, position the cube so emerging roots can reach the shallow nutrient stream without leaving the entire cube saturated.
Common Rockwool Mistakes to Avoid
Overwatering causes more trouble than slightly uneven surface moisture. A constantly saturated cube contains less air, which can slow root development.
Other common errors include:
- Using construction-grade insulation
- Skipping the manufacturer’s preparation instructions
- Squeezing cubes after soaking
- Feeding new seedlings with strong nutrients
- Allowing light to reach wet rockwool and encourage algae
- Transplanting before roots emerge
- Letting cubes dry completely
- Handling dry fibers without gloves
A green coating usually indicates algae. Algae does not always kill a plant, but it competes for resources and suggests that too much light reaches the moist surface. Cover the exposed cube with a suitable collar or clay pebbles while keeping the stem uncovered.
Recommended Products for Using Rockwool Cubes
Availability and product specifications can change, so confirm cube dimensions and system compatibility before ordering.
1. Grodan 1.5-Inch Rockwool Mini Blocks
These Grodan starter cubes suit seeds, cuttings, and compact propagation trays. Their small size works well for growers who plan to transfer seedlings into net pots or larger blocks.
2. Reeooue Rockwool Cubes and Net Pots Kit
The Reeooue starter set combines small cubes with two-inch mesh cups. It may save beginners from purchasing two components separately, but check that the cups fit your system’s openings.
3. Halatool Two-Inch Cubes and Three-Inch Net Cups
This Halatool rockwool kit provides larger cubes and cups. It is a practical option for bigger seedlings or systems designed around three-inch planting sites.
4. Apera Instruments PH20 pH Tester
The Apera PH20 meter offers digital pH testing and calibration features. A dependable meter makes conditioning cubes and managing the nutrient reservoir much easier.
5. General Hydroponics pH Control Kit
The General Hydroponics pH Control Kit includes products for checking and adjusting solution pH. Add adjusters gradually and follow the safety directions on the label.
Final Thoughts
Rockwool cubes give hydroponic seedlings a clean, supportive place to develop before entering the main system. Success comes down to a few simple habits: choose horticultural-grade cubes, follow the label’s preparation directions, maintain an appropriate pH, and avoid oversaturating the root zone.
Handle each cube gently and transplant the whole unit once strong roots appear. With those basics in place, rockwool can make propagation more consistent and considerably less frustrating.
FAQs
Do rockwool cubes need to be soaked before use?
Check the package. Some cubes require pH conditioning, while modern stabilized products may only need normal wetting. Use the preparation directions provided with the product you purchased.
What pH should I use for rockwool?
Most hydroponic crops grow well around pH 5.5 to 6.5. However, the correct range depends on the crop and the preparation directions supplied with the cubes.
How often should I water rockwool cubes?
Water when a cube becomes noticeably lighter, not according to a rigid schedule. Keep it evenly moist without leaving it submerged or fully saturated.
Can I put rockwool directly into a net pot?
Yes. Choose a cube that fits securely, then support it with clay pebbles if necessary. Keep the cube’s upper surface away from direct contact with the reservoir.
Can rockwool cubes be reused?
Reusing them is rarely practical because roots grow through the fibers and remain after harvest. Reuse may also transfer algae or disease to the next crop. Check for local horticultural recycling programs instead.