10 DIY Hydroponic Automation Ideas for Busy Gardeners
We may earn a commission for purchases made using our links. Please see our disclosure for more details.
Busy gardeners do not always have time to check water levels, adjust timers, test nutrients, or monitor grow lights every day. That is where hydroponic automation can make a big difference. With a few simple DIY upgrades, you can keep your system more consistent, reduce daily maintenance, and help your plants grow with fewer interruptions. In this guide, you’ll learn 10 practical hydroponic automation ideas that are easy to set up, beginner-friendly, and useful for real home growing.
What Hydroponic Automation Really Means
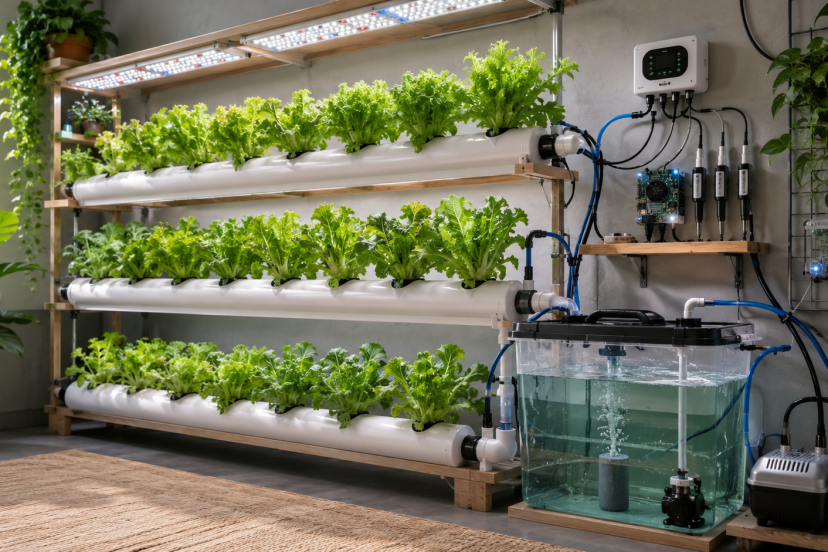
Hydroponic automation is the use of timers, sensors, pumps, controllers, and smart devices to manage routine growing tasks.
It can help you:
- Turn lights on and off
- Run pumps on schedule
- Track pH and nutrient strength
- Dose nutrients more consistently
- Monitor temperature and humidity
- Get alerts when water levels drop
The goal is not to remove you from gardening. The goal is to stop tiny mistakes from becoming plant drama. Your lettuce does not care that your meeting ran late. Your pump still needs to run.
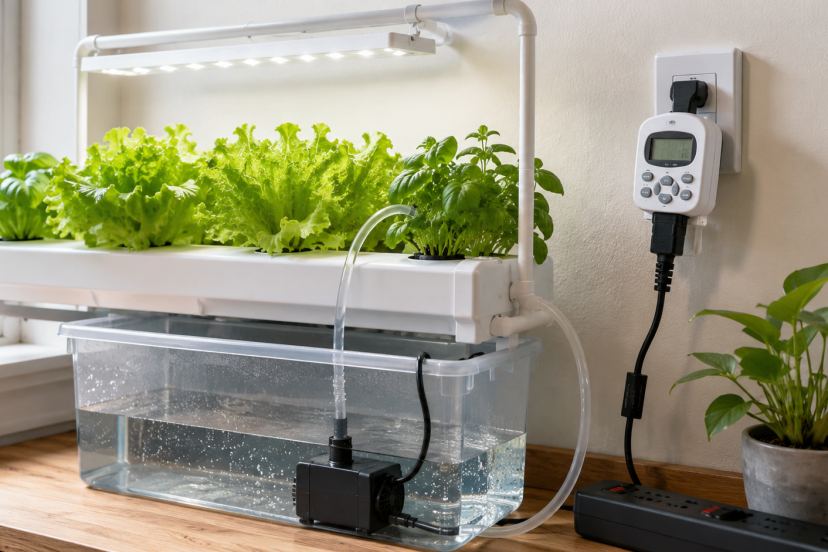
1. Start With a Simple Pump Timer
This is the easiest automation upgrade for most beginners.
A digital timer can turn your water pump on and off at set intervals. This works especially well for drip systems, ebb and flow systems, and some tower gardens.
Instead of guessing when to water, you can set a rhythm. For example, you might run the pump for 15 minutes every hour during the day. The exact timing depends on your system, plant size, growing medium, and room temperature.
Start conservative. Watch your plants. Then adjust.
2. Automate Your Grow Lights
Grow lights are perfect for automation because plants love consistency.
A timer keeps your light schedule steady, even when your real-life schedule is not. Leafy greens often do well with long daily light periods, while fruiting crops may need stronger lighting and careful timing.
Use a heavy-duty timer or smart plug rated for your light’s wattage. That last part matters. Cheap timers and high-powered lights are not always best friends.
Set the schedule once, then let it run.
3. Use Smart Plugs for Remote Control
Smart plugs are a nice middle ground between basic timers and advanced controllers.
You can use them for:
- Grow lights
- Small pumps
- Fans
- Air pumps
- Backup circulation devices
Many smart plugs let you create schedules from your phone. Some also let you turn equipment on remotely. That is helpful when you are away and realize your grow tent is getting warmer than usual.
For safety, avoid using smart plugs near splashing water unless they are placed high, dry, and protected.
4. Set Up Water-Level Alerts
Low water is one of the sneakiest hydroponic problems.
Plants drink. Water evaporates. Pumps keep running. Then one day your reservoir looks like a sad puddle.
A simple water-level sensor can alert you before the pump runs dry. Some DIY growers use float switches. Others use smart leak sensors placed near the reservoir area.
You can keep this very simple: if the water drops too low, you get a reminder to top up the tank. That alone can save roots, pumps, and your mood.
5. Monitor pH and TDS More Easily
You do not have to automate pH adjustment right away. Monitoring is a great first step.
pH affects nutrient availability, while TDS or EC gives you a rough idea of nutrient strength. Oklahoma State University explains that nutrient solution pH influences nutrient availability and that soilless nutrient solutions are often managed around mildly acidic ranges.
A handheld pH and TDS meter is not fully automatic, but it speeds up your weekly checks. If you want to go further, you can use continuous pH/EC monitors that stay in the reservoir.
The key is to avoid chasing tiny changes. Look for patterns.
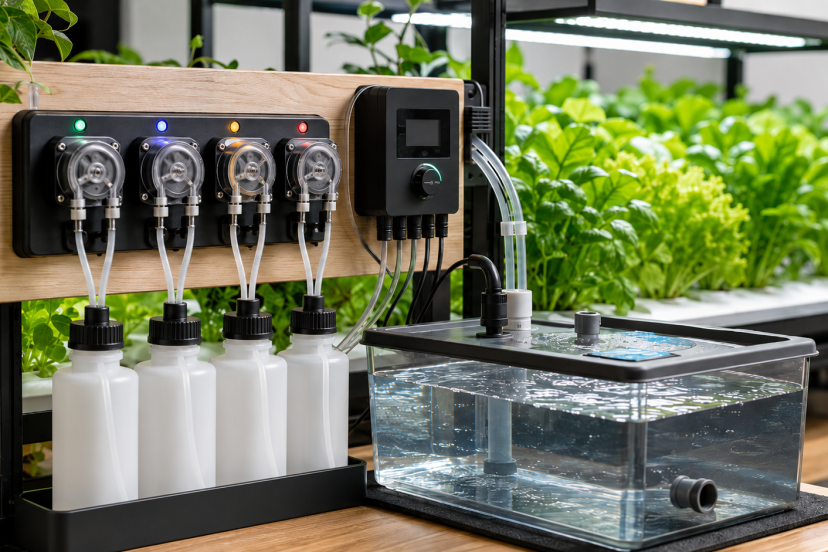
6. Automate Nutrient Dosing
This is where Hydroponic Automation starts to feel a little more advanced.
A dosing pump can add small amounts of nutrient solution, pH up, or pH down. Some systems use peristaltic pumps controlled by timers. Others use controllers that respond to pH or EC readings.
A 2025 scoping review of automated hydroponic nutrient dosing systems found that pH, EC, TDS, nutrient solution volume, and temperature are common variables in automated dosing research. The review also highlights feedback-loop and predictive methods as key approaches in modern dosing frameworks.
For home growers, keep dosing simple at first. Automate small nutrient additions before you trust a system with full pH correction.
7. Add Temperature and Humidity Sensors
Your plants feel the room, even if you only look at the reservoir.
A basic temperature and humidity sensor can show whether your grow area gets too hot, too dry, or too damp. Some smart sensors send phone alerts. That gives you time to open a vent, turn on a fan, or adjust your light schedule.
This is especially useful in closets, garages, balconies, and small indoor grow tents.
Hydroponic roots also care about water temperature. Warm water can hold less oxygen, which may stress roots. So, if your system runs warm, consider monitoring reservoir temperature too.
8. Improve Air Pump Control
In deep water culture and similar systems, air pumps help keep roots supplied with oxygen.
Some gardeners run air pumps 24/7. Others use timers, especially in small systems. Before changing your air pump schedule, make sure your roots stay healthy and your water remains well aerated.
If you are unsure what size pump you need, this guide to choosing a hydroponic air pump is a helpful next read.
A simple backup air pump can also be a smart “automation” choice. It does not sound glamorous, but backup oxygen can protect plants during equipment failures.
9. Try a Basic Camera Monitoring Setup
A small Wi-Fi camera can help you check your hydroponic garden when you are away.
You can see if lights turned on, water overflowed, leaves wilted, or a curious pet decided to inspect your basil. This is not true automation, but it supports automated growing because you can catch problems early.
Place the camera where it can see the reservoir and plants without being exposed to water spray.
10. Build an Arduino or Raspberry Pi Dashboard
If you enjoy tinkering, this is the fun rabbit hole.
An Arduino or Raspberry Pi setup can collect data from sensors and display it in one place. You can track pH, temperature, humidity, water level, light status, and pump cycles.
Start with one sensor. Get it working. Then add more.
Many growers make the mistake of building a complicated dashboard before their basic garden is stable. Do the opposite. Grow healthy plants first. Add tech second.
Create a Weekly Automation Routine
Automation still needs supervision.
Set a weekly routine to:
- Calibrate meters
- Check pump function
- Clean filters and tubing
- Inspect roots
- Top up the reservoir
- Review pH and TDS trends
- Confirm timers and plugs are working
Think of automation like cruise control. It helps, but you still keep your hands near the wheel.
Recommended Products
Here are five useful product ideas for DIY hydroponic automation:
1. TP-Link Kasa Smart Plug HS103
Great for controlling small pumps, fans, or grow lights from your phone. It is best for growers who want simple scheduling without building a full controller.
2. BN-LINK 7 Day Heavy Duty Digital Programmable Timer
A practical choice for pump cycles and grow light schedules. It is simple, affordable, and beginner-friendly.
3. VIVOSUN 800GPH Submersible Pump
Useful for larger reservoirs, nutrient circulation, or DIY drip systems. Always match pump size to your system so you do not overdo the flow.
4. VIVOSUN pH and TDS Meter Combo Kit
A handy starter tool for checking nutrient strength and pH. It is not automatic, but it helps you make better decisions before adding advanced controls.
5. Jebao Programmable Auto Dosing Pump DP-4
Helpful for growers who want to experiment with automated nutrient dosing. Use small doses first and test often until you trust your settings.
Research and References Worth Noting
For a deeper technical look, this automated hydroponic nutrient dosing review explains how pH, EC, TDS, nutrient solution volume, and temperature are used in automated dosing systems. It is useful if you want to understand where DIY Hydroponic Automation overlaps with commercial precision growing.
For practical grower guidance, Oklahoma State University Extension’s electrical conductivity and pH guide for hydroponics explains why pH and EC matter in hydroponic nutrient solutions. This makes it a helpful reference for understanding two of the most important readings your sensors or meters should track.
Conclusion
Hydroponic automation does not need to be expensive, confusing, or overbuilt. Start with one simple upgrade, such as a pump timer or grow light schedule. Then add monitoring tools as your confidence grows. The best setup is not the one with the most gadgets. It is the one that keeps your plants stable, healthy, and easy to manage around your real life.
FAQs
1. What is the easiest hydroponic task to automate first?
Start with grow lights or water pumps. Both are easy to control with a timer, and both benefit from a consistent schedule.
2. Do I need a full hydroponic controller?
No. Most home growers can start with timers, smart plugs, and handheld meters. A full controller makes more sense for larger or more valuable systems.
3. Can I automate pH adjustment?
Yes, but do it carefully. Automated pH dosing can overshoot if the system is not calibrated. Beginners should monitor pH manually before adding dosing pumps.
4. Are smart plugs safe for hydroponics?
They are generally safe as long as you use them properly. Keep them dry, elevated, and away from splashes. Also, make sure they can handle the wattage of your equipment.
5. How often should I check an automated hydroponic system?
Check it daily with a quick visual scan. Then do a deeper weekly check for pH, TDS, water level, pump function, and root health.