How to Build a DIY Hydroponics Tower
We may earn a commission for purchases made using our links. Please see our disclosure for more details.
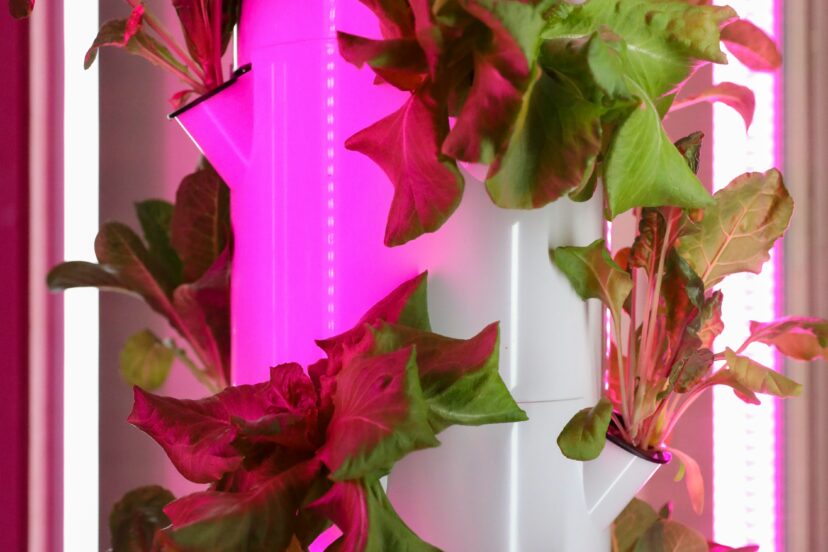
Growing fresh herbs and veggies at home could mean dealing with dirt, mess, or a big backyard. Actually, it’s not always the case, thanks to gardening innovations these days. There’s a much more efficient way to do that with less effort and space. A hydroponics tower is a sustainable and space-saving way to grow plants at home. You can either setup your garden indoors, on your balcony, or even in your backyard. So, are you ready to get started? Here are step-by-step instructions on how to build your hydroponics tower.
Why Build a DIY Hydroponic Tower?
A DIY hydroponics tower is great for gardeners who want fresh herbs right at their fingertips. This hydroponic system allows you to grow and cultivate lettuce or tomatoes no matter where you live! Hydroponic towers make gardening super easy and possible, even if you only have a small space. They use way less water than traditional gardening and let you grow plants faster. Once they’re set up, maintenance is a breeze (yes, you’ll get the hang of it, trust me). Who doesn’t love fresh food with less effort?
What You’ll Need to Get Started
Before we jump into building, let’s talk about supplies. Here’s what you’ll need:
- PVC Pipe or Vertical Tubing – This will be the main structure of your tower.
- Water Pump – To keep the nutrient solution flowing.
- Reservoir (Bucket or Tub) – This holds the water and nutrients your plants need.
- Net Pots – These small pots will hold your plants in place.
- Growing Medium – Options like rock wool, clay pebbles, or coco coir work well.
- Nutrient Solution – A mix of minerals that will feed your plants.
- Drill and Hole Saw – You’ll use these to create spots for your plants.
- Tubing and Fittings – Helps direct water to where it’s needed.
- LED Grow Light (Optional) – If growing indoors, your plants will need some extra light.
Got everything? Great! Let’s start building.
Step 1: Choose the Right Location
Let’s start with where to put your hydroponic tower. Make sure there is enough sunlight if you are growing indoors, or consider using an LED grow light. Choose a spot that gets at least 6 to 8 hours of sunshine if you’re setting up outside. Steer clear of places with high winds or extremely high or low temperatures. Like you, you want your plants to feel at ease!
Step 2: Preparing the Tower Structure
Cut your PVC pipe to the correct height; a good starting point is between 4 and 6 feet. Next, take out your hole saw and drill to make holes that are evenly spaced for your plants. Your net pots should fit snugly into these holes because they are precisely the right size. Create little windows from which your plants would grow and peek.
Step 3: Assembling the Base and Reservoir
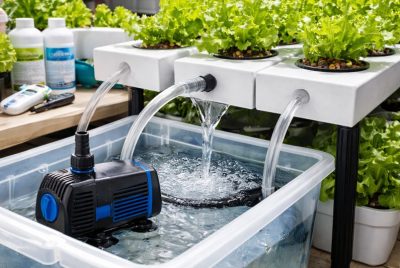
You need a stable foundation for your hydroponics tower. At the bottom, place a sturdy bucket or tub that will serve as your reservoir and hold the nutrient solution. Inside, a water pump will deliver nutrients to the plants. Because no one likes a tower that wobbles, be sure your setup is stable!

Step 4: Installing the Pump and Tubing
Now, let’s get the water flowing. Connect the pump to a tube that runs up the inside of the tower. This tube will carry water up to the top, letting it trickle down to the plants like a mini waterfall. Secure the tubing so it stays in place, and double-check for leaks before moving on.
Step 5: Adding the Net Pots and Growing Medium
Slide your net pots into the holes you drilled earlier. Fill them with a lightweight growing medium like rock wool or clay pebbles. This will keep water and nutrients flowing freely to the roots of your plants while also helping to hold them in place. Think of it as giving your plants a comfy little home.
Step 6: Preparing the Nutrient Solution
Even plants need nourishment! Fill the reservoir with water and your hydroponic nutrients. To get the proper balance, adhere to the directions on your nutrient mix. To check, get a basic pH testing kit. The ideal pH range is between 5.5 and 6.5. Before continuing, make any necessary adjustments if the levels are off. The proper nutrients are the foundation of happy plants!
Step 7: Planting Your Crops
Now for the fun part—adding plants! Gently place the seedlings into the net pots. Some great options for hydroponic towers include lettuce, spinach, basil, and strawberries. Avoid plants with deep, complex root systems, as they might struggle in this setup. Once your plants are settled in, they’re ready to grow!
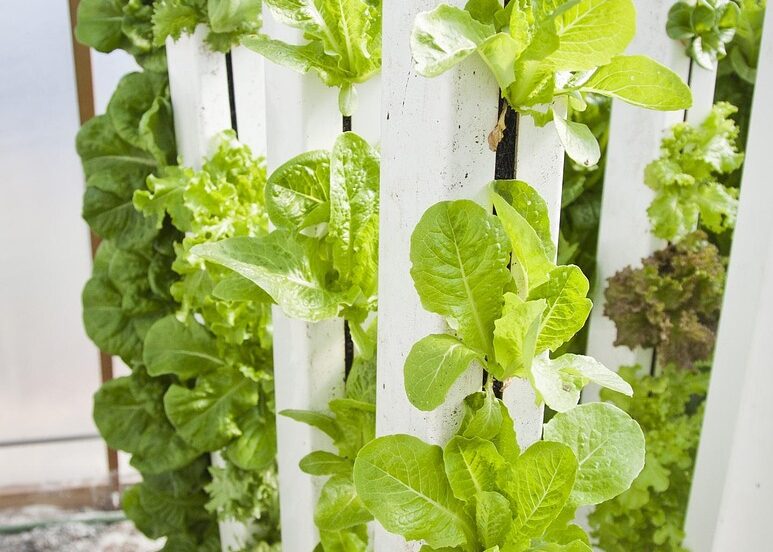
Step 8: Setting Up the Water Cycle
Time to bring your tower to life. Turn on the pump and let the nutrient solution flow. You’ll want a steady but gentle water cycle so each plant gets the nutrients it needs without drowning. If you want to automate things, a timer can help regulate how often the pump runs. Set it, forget it, and let nature do its thing!
Step 9: Providing Light for Growth
Plants need light to thrive. If your tower is outside, you’re all set with the sun. If you’re growing indoors, an LED grow light is a great investment. Keep it on for about 12-16 hours a day. Your plants will thank you with lush, green growth!
Step 10: Monitoring and Adjusting pH Levels
Every few days, check your water’s pH and nutrient levels. If your plants look sad, the pH might be off. Keep a testing kit handy and make small adjustments as needed. A balanced system means happier, healthier plants.
Step 11: Regular Maintenance and Cleaning
A little upkeep goes a long way. Here’s what you should do:
- Check for clogs in the tubing.
- Refill the nutrient solution weekly.
- Clean the system every few weeks to keep algae and bacteria away.
It’s easier than it sounds, and your plants will reward you with amazing growth!
Common Problems and Solutions
Even the best hydroponic towers can run into issues. The good news? Most problems have simple fixes! Here are some common ones you might face and how to deal with them.
- Wilting Plants? Check if the pump is working properly.
- Algae Growth? Cover the reservoir to block light exposure.
- Slow Growth? Adjust nutrient concentration and pH levels.
Benefits of a Hydroponic Tower System
So why should you choose a hydroponic tower over traditional gardening? Here are some great reasons:
- Space-Saving: Grow more food in less space.
- Water-Efficient: Uses way less water than traditional gardening.
- Faster Growth: Plants grow 30-50% faster here than in soil.
- Fewer Pests: No soil means fewer bugs—win-win!
Advancements in Hydroponic Tower Systems
Recent studies have highlighted significant progress in hydroponic tower systems. For instance, research on the use of tower systems in vertical farming techniques demonstrates how vertical structures can optimize space and enhance crop yields. Additionally, a comparison of hydroponic tower systems for lettuce production reveals that certain designs can significantly boost efficiency and output.
Conclusion
So, there you have it! A hydroponics tower is a fantastic way to grow fresh food at home with minimal space and effort. It’s easy to build, fun to maintain, and super rewarding. If you’ve ever dreamed of growing your own greens, now’s your chance to make it happen. Happy growing!
FAQs
1. What is the best plant to grow in a hydroponic tower?
Lettuce, basil, spinach, and strawberries are great choices.
2. How many times should the nutrient solution be changed?
Every 1-2 weeks, depending on how much your plants drink up.
3. Can I build a hydroponic tower without a pump?
Yes, but a pump helps keep things efficient. A gravity-fed system is an alternative.
4. How do I prevent algae growth in my system?
Cover the reservoir and limit light exposure.
5. Is a hydroponic tower better than traditional gardening?
For small spaces and water savings—absolutely!

