How To Create A Hydroponic Grow Tent
We may earn a commission for purchases made using our links. Please see our disclosure for more details.
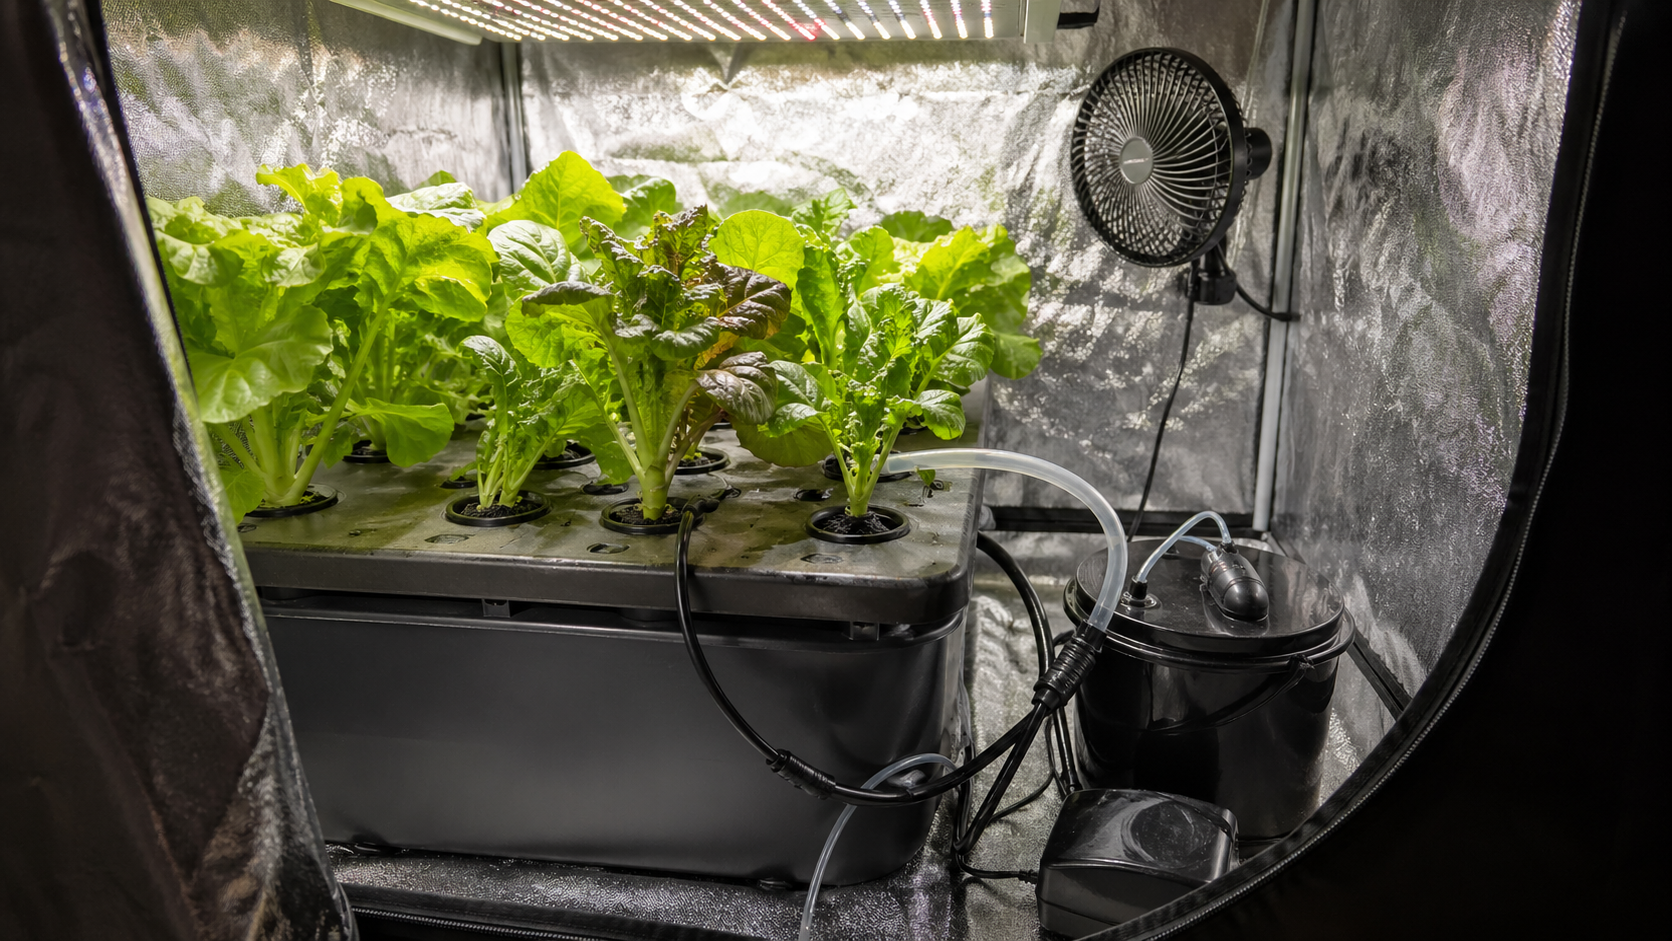
A hydroponic grow tent makes indoor gardening feel a lot more doable, even if you do not have a backyard. You can grow herbs, lettuce, and small vegetables in a clean, controlled space using water and nutrients instead of soil. In this guide, we’ll walk through the basics: choosing the right tent, setting up lights and airflow, managing nutrients, and keeping your plants healthy from the start.
What Is a Hydroponic Grow Tent?
A hydroponic grow tent is an enclosed indoor growing space used with a soilless gardening system. Plants grow in water mixed with nutrients instead of traditional soil. The USDA defines hydroponics as growing plants with a water-based nutrient solution, often with media like coconut coir, perlite, or vermiculite for root support.
The tent creates a stable environment. It reflects light back toward your plants, keeps the grow area tidy, and helps you control humidity, temperature, and airflow.
In simple terms, the grow tent is the “room,” and the hydroponic system is the “kitchen” that feeds your plants.
Why Build a Hydroponic Grow Tent at Home?
A hydroponic grow tent is ideal if you want year-round gardening. University of Minnesota Extension notes that hydroponics works indoors or outdoors, uses less water than soil gardening, and can support year-round growth with artificial lighting.
That means you can grow lettuce in winter, basil in a small apartment, or leafy greens on a tight schedule. Plus, there are no weeds to pull. That alone deserves a tiny celebration.
A grow tent also helps you avoid many outdoor problems, such as pests, heavy rain, poor soil, and sudden temperature swings. You still need to monitor your plants, of course, but you get far more control.
Choose the Right Grow Tent Size
Before buying anything, decide where the tent will go. A 2×2-foot tent works well for beginners who want herbs, lettuce, or one compact hydroponic bucket system. A 2×4-foot tent gives you more room for leafy greens, small peppers, or a few separate containers. A 4×4-foot tent works better if you want a serious indoor garden.
Do not buy the biggest tent just because it looks impressive. Larger tents need stronger lights, more airflow, and more electricity. Instead, match the tent to your space, budget, and plant goals.
For most beginners, a 2×2 or 2×4 tent is a smart start. It is easier to manage, easier to clean, and less intimidating when you are learning.
Pick the Best Hydroponic System for Your Tent
You can use several hydroponic systems inside a grow tent. However, some are easier than others.
A deep water culture system is one of the simplest choices. Plants sit in net cups above a nutrient-filled reservoir while an air pump adds oxygen to the water. It works especially well for lettuce, basil, and leafy greens.
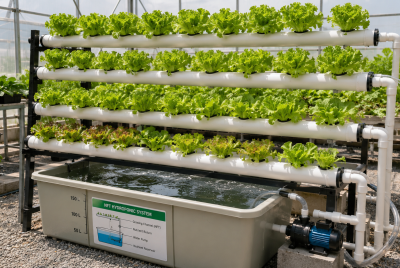
A drip system can support larger plants because it delivers nutrient solution directly to the root zone. Meanwhile, an NFT system can grow many greens in a compact layout, but it needs careful water flow.
If you want a beginner-friendly option, start with buckets. You can also read this helpful guide on building a hydroponic bucket system if you want a simple setup that fits nicely inside a small grow tent.
Essential Supplies You’ll Need
Before you set up your hydroponic grow tent, gather the core supplies first. Having everything ready makes the process smoother and helps you avoid stopping halfway through the setup.
You’ll need:
- Grow tent to create a controlled indoor growing space
- LED grow light to give plants consistent light
- Hydroponic reservoir or bucket system to hold the nutrient solution
- Net cups to support your plants above the water
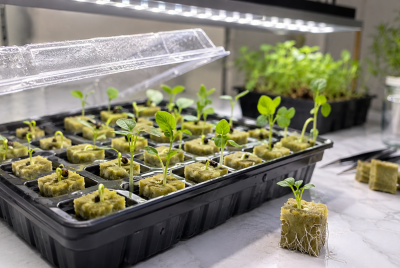
- Growing medium such as clay pebbles, rockwool, perlite, or coconut coir
- Air pump, air stone, and tubing to add oxygen to the water
- Hydroponic nutrients to feed your plants
- pH testing kit to monitor water balance
- Timer to control your light schedule
- Clip fan to improve airflow inside the tent
- Thermometer-hygrometer to track temperature and humidity
For beginners, clay pebbles and rockwool cubes are usually the easiest growing media to manage. Clay pebbles support the roots without staying too wet, while rockwool cubes work well for starting seeds and young plants.
How To Set Up a Hydroponic Grow Tent Step by Step
Follow these steps to build a clean, stable setup before adding your plants.
Step 1: Choose the Right Location
Place your grow tent near an outlet and in a room with stable temperature. Avoid damp corners, direct sunlight, or spots that get too hot during the day.
Step 2: Clean the Setup Area
Wipe down the floor and nearby surfaces before assembling the tent. A clean space helps reduce dust, pests, and mold problems later.
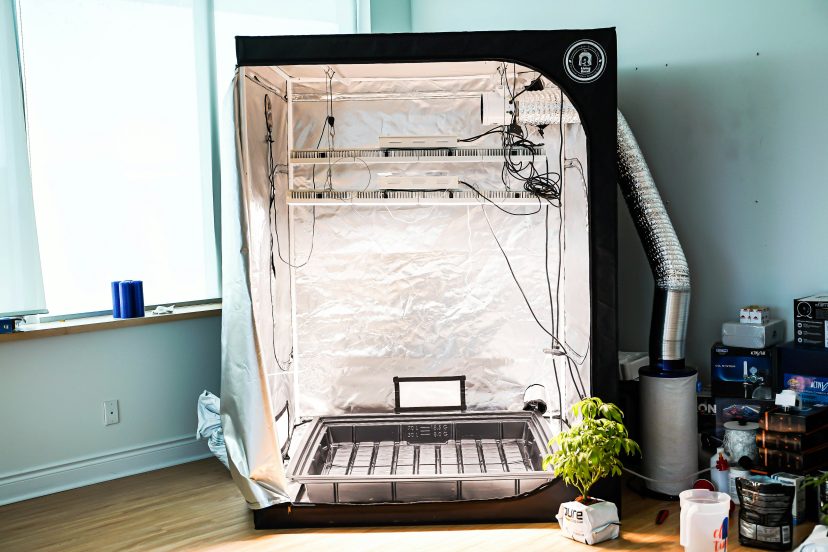
Step 3: Assemble the Grow Tent
Build the tent frame first, then pull the fabric cover over it. Make sure the zippers close smoothly. Then place the waterproof tray at the bottom.
Step 4: Install the Grow Light
Hang your LED grow light with adjustable ratchet hangers. Keep it higher at first, especially for seedlings. You can lower it later as your plants grow stronger.
Step 5: Set Up the Hydroponic System
Place your reservoir or bucket system inside the tent. Fill it with clean water, add nutrients according to the label, and mix well.
Step 6: Add Oxygen to the Water
Connect the air stone to the air pump using tubing. Then place the air stone inside the reservoir. This keeps oxygen moving around the roots.
Step 7: Add Your Plants
Place seedlings in net cups with your chosen growing medium. Make sure the roots can reach moisture, but do not let the plant crown sit in water.
Step 8: Set the Light Schedule
Plug your grow light into a timer so your plants get consistent light each day. During the first week, check the plants daily and adjust the light height, water level, or airflow as needed.
Lighting, Airflow, and Temperature Tips
Your grow tent needs steady light, fresh air, and a comfortable temperature to keep plants healthy.
Use a full-spectrum LED grow light for most indoor hydroponic setups. It gives plants the light they need while producing less heat than older grow lights.
Keep these basics in mind:
- Too little light can make plants tall, weak, and floppy.
- Too much light can stress leaves and waste electricity.
- Gentle airflow helps reduce humidity and keeps stems stronger.
- Stable temperature helps plants grow more evenly.
A small clip fan works well inside most grow tents. Aim for a soft breeze, not strong wind. If the tent feels too hot or stuffy to you, it may also be stressful for your plants.
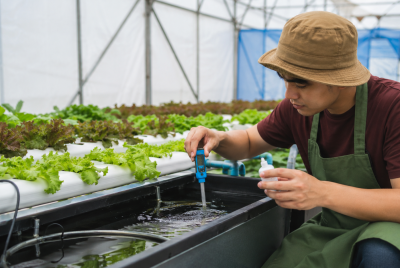
Nutrients, pH, and Water Management
Hydroponic plants rely on the water solution for all their nutrients. Because there is no soil, you need to check the water regularly.
Start with a beginner-friendly hydroponic nutrient formula and follow the label directions. For young seedlings, use a lighter mix at first. Too much nutrient solution can damage delicate roots.
Pay attention to these simple checks:
- pH level: Keep it in the right range for your plants. Many hydroponic crops prefer slightly acidic water.
- Water level: Top off the reservoir when it gets low.
- Water quality: Replace the solution regularly to keep it fresh.
- Cleanliness: If the water smells bad, turns cloudy, or feels slimy, clean the system and refill it.
Good water management keeps the roots healthy, and healthy roots usually mean stronger plants.
Best Plants To Grow in a Hydroponic Grow Tent
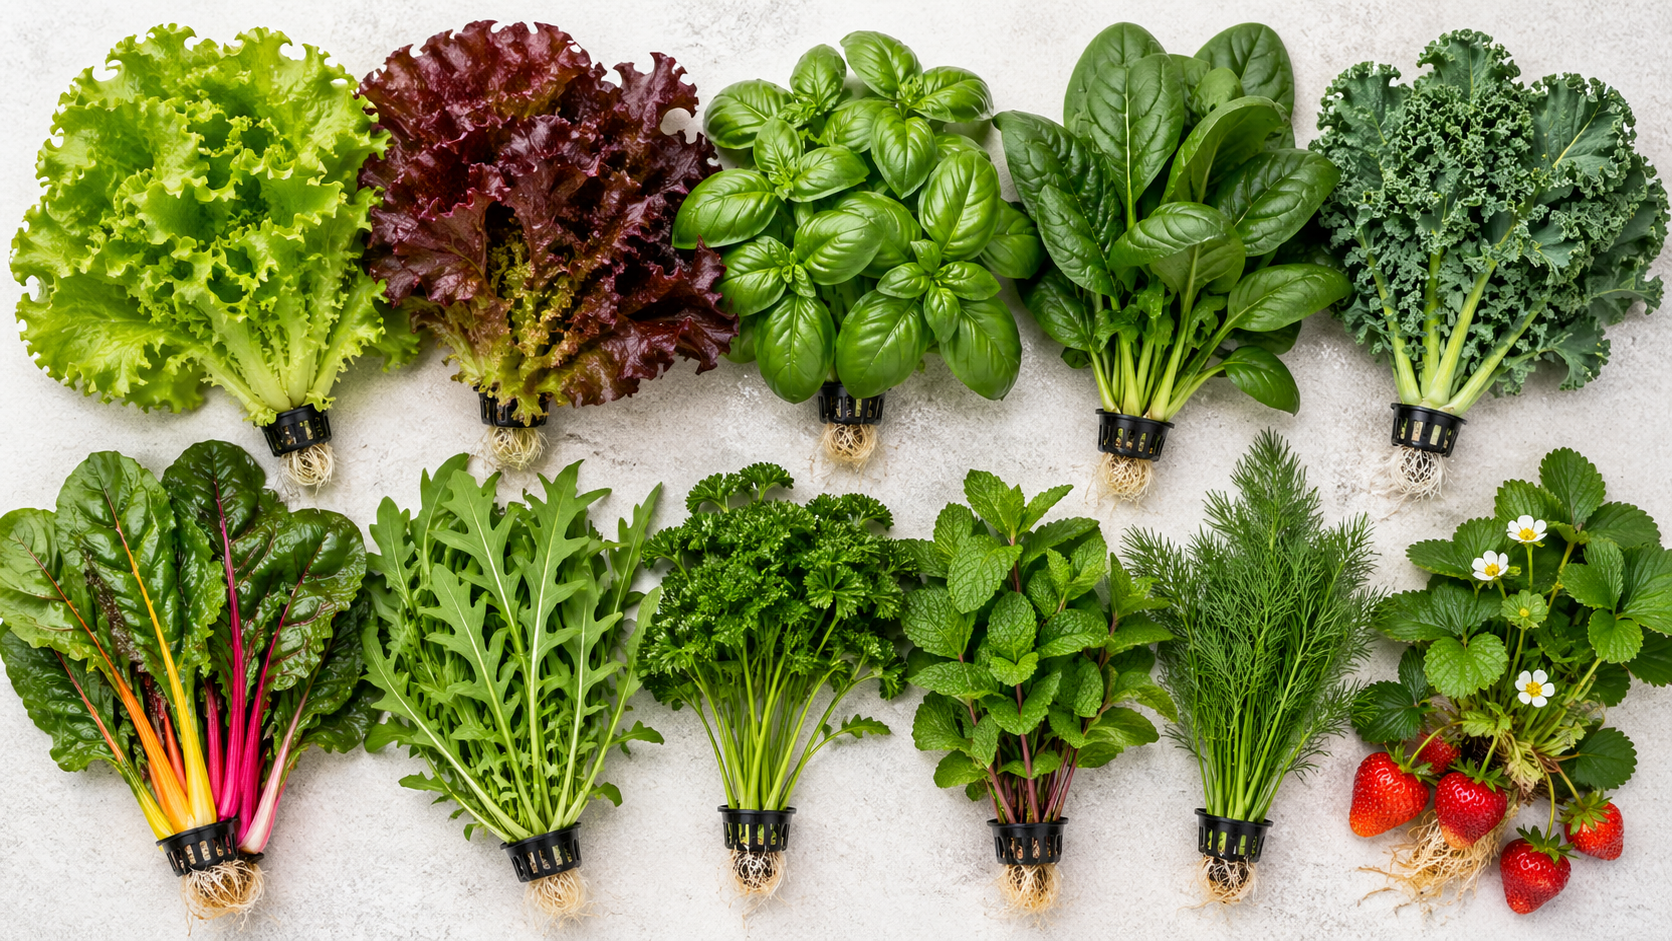
Leafy greens are the easiest place to start. Try lettuce, spinach, kale, arugula, and Swiss chard. They grow quickly and do not need huge root space.
Herbs also do well. Basil, mint, parsley, cilantro, and dill can thrive in a small tent with good light.
Once you gain confidence, try strawberries, dwarf tomatoes, or peppers. These plants need more light, more nutrients, and more patience, but they can be rewarding.
Avoid oversized crops at first. Corn, pumpkins, and large vining plants are not friendly roommates in a small grow tent.
How a Controlled Environment Supports Better Plant Growth
A hydroponic grow tent performs best when the growing conditions stay steady. That is one of the biggest benefits of using a tent in the first place.
According to research on hydroponic greenhouse systems, hydroponics can improve water efficiency, reduce exposure to soil-borne diseases, and protect crops from changing outdoor conditions. In a home grow tent, that means you can create a cleaner and more predictable space for healthy plant growth.
This idea is also supported by a study on a small-scale indoor hydroponic system for leafy vegetables, which found that maintaining proper temperature, humidity, and nutrient solution pH helped support successful lettuce growth indoors.
When you manage light, airflow, water, and nutrients consistently, your hydroponic grow tent becomes much more productive and easier to manage.
Final Thoughts
Creating a hydroponic grow tent gives you a practical way to grow fresh herbs, greens, and small vegetables indoors with more control and less guesswork. Once you choose the right tent, set up proper lighting, manage airflow, and keep your water, nutrients, and pH balanced, your plants have everything they need to grow well. Start with easy crops like lettuce, basil, or spinach, then expand as you gain confidence. With a simple setup and steady care, a hydroponic grow tent can turn even a small indoor space into a reliable year-round garden.
FAQs
1. What size hydroponic grow tent is best for beginners?
A 2×2 or 2×4 grow tent is best for most beginners. It gives you enough room for herbs, lettuce, and a small bucket system without becoming expensive or hard to manage.
2. Do I need soil in a hydroponic grow tent?
No. Hydroponics uses a nutrient-rich water solution instead of soil. However, you may still use growing media like clay pebbles, rockwool, perlite, or coconut coir to support the roots.
3. How much light does a hydroponic grow tent need?
Most indoor hydroponic plants need strong, consistent light from a full-spectrum LED grow light. Leafy greens usually need less intensity than fruiting plants like tomatoes or peppers.
4. Is a hydroponic grow tent expensive to run?
It depends on tent size, light wattage, fan use, and local electricity rates. A small 2×2 tent with an efficient LED light is usually much cheaper to run than a large 4×4 setup.
5. What is the easiest plant to grow in a hydroponic grow tent?
Lettuce is one of the easiest plants to grow in a hydroponic grow tent. Basil, mint, arugula, and spinach are also beginner-friendly choices.