How to Build a Small DIY Hydroponic Bucket System
We may earn a commission for purchases made using our links. Please see our disclosure for more details.
A hydroponic bucket system is the simplest method of growing plants without soil. It’s easy, inexpensive, and perfect for green thumbs who want to grow herbs or leafy greens at home. With only a bucket, nutrient solution, and simple air system, you can build a small system that is easy to manage and doesn’t take up much space. I’ll teach you how to make your own mini DIY hydroponic bucket system, what materials you’ll need, and how to keep it maintained.
Why a Small Hydroponic Bucket System Is a Great Way to Start
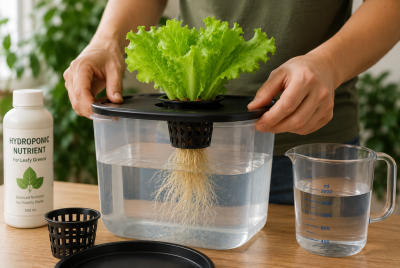
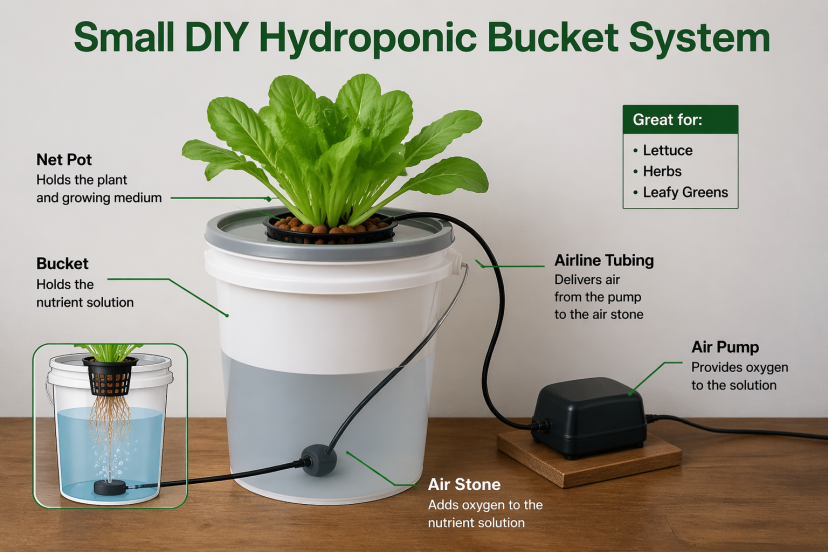
A mini homemade hydroponic bucket system is the right choice in order to keep things simple in the first place. There’s no need for an elaborate setup or a bunch of confusing components. A bucket or container that blocks light, a net pot, growing media, water, nutrients, and a source of oxygen. That’s one reason deep water culture is so popular with home gardeners. It’s inexpensive and manageable, and I think it’s a great way for people to learn the basics without getting too intimidated.
The plant sits at the top while the roots hang down into nutrient-rich water below. An air pump and air stone keep that water oxygenated, which matters because roots still need oxygen even in water.
A review on hydroponics for small- and medium-scale growing shows that smaller systems can work very well when the setup stays stable and the nutrients are managed properly.
A study on root zone dissolved oxygen in hydroponic tomatoes also found that oxygen around the roots plays a big role in plant health, which is why steady aeration matters in a bucket system.
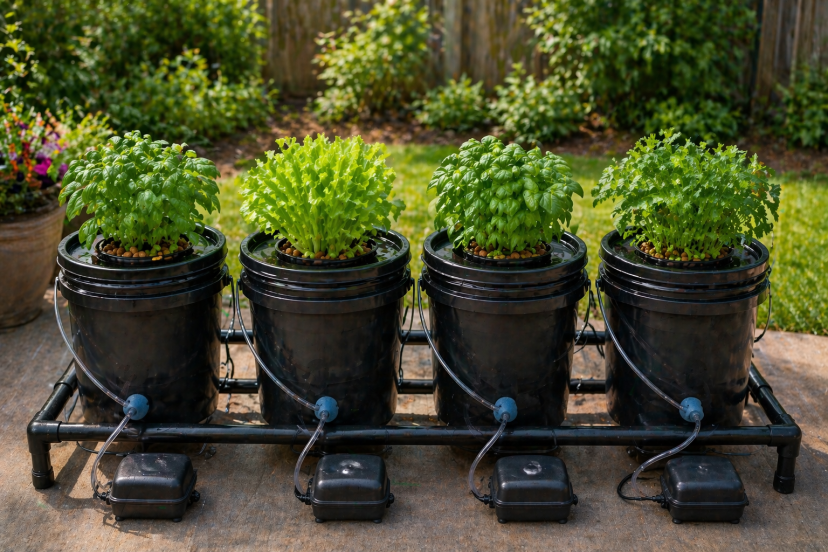
This type of system works really well for herbs and leafy greens. Crops like lettuce, basil, and spinach grow fast, stay manageable, and are much easier for beginners than larger fruiting plants. So instead of building something big right away, you can start with one bucket and learn as you go.
What You Need Before You Build
Before you start, grab the basics for a simple one-bucket setup:
- a 5-gallon food-safe bucket with lid
- a net pot that fits the lid opening
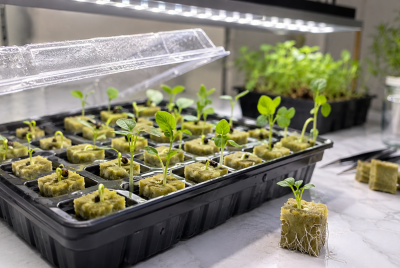
- expanded clay pebbles or another inert growing medium
- an air pump, airline tubing, and an air stone
- a hydroponic nutrient for edible plant
- a pH meter or pH test kit
- seeds or seedlings
- a drill with a hole saw bit
- optional: an LED grow light if you plan to grow indoors
The bucket itself matters more than it might seem. You want a clean, food-safe container that can hold water safely without leaching anything unwanted.
Best Plants To Grow In A Bucket System First
Start with crops that forgive small mistakes.
Lettuce, basil, spinach, kale, mint, parsley, and similar herbs are usually the best first picks. Illinois Extension says leafy greens and herbs are great starter crops because they grow quickly and take up minimal space indoors.
Oregon State and Virginia Tech say much the same, with lettuce and culinary herbs repeatedly showing up as ideal DWC crops.
Could you grow tomatoes in a bucket? Sure. Should that be your first move? Probably not. Fruiting crops are heavier feeders, take longer, and often need more support, stronger lighting, and more active monitoring.
If your goal is quick success, leafy greens are the smarter play.
How to Build a Small DIY Hydroponic Bucket System Step by Step
1. Prepare the bucket
Wash the bucket and lid well. Cut or drill a hole in the lid so the net pot fits snugly. It should sit securely without falling through. If the bucket lets light in, cover or paint the outside to keep the nutrient solution dark and reduce algae growth.
2. Set up the air line
Make a small hole near the top of the bucket for the airline tubing if needed. Attach the airline tubing to the air pump, connect the other end to the air stone, and set the air stone in the bottom of the bucket.Set the air stone in the bottom of the bucket. This will keep oxygen moving through the water.
3. Add water and nutrients
Fill the bucket with water. Then add the hydroponic nutrients based on the label instructions. Do not guess the amount. Too much nutrient can damage young plants.
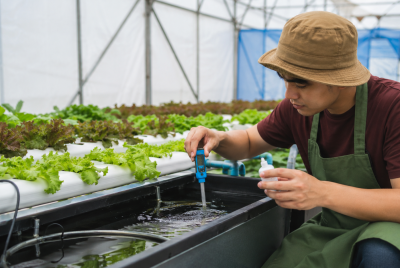
4. Check and adjust the pH
Test the nutrient solution before adding your plant. Keeping the pH slightly acidic (usually between 5.5 and 6.5) helps plants absorb nutrients more easily. Adjust the pH if needed so the plant can absorb nutrients properly.
5. Place the plant in the net pot
Put your seedling or starter plug into the net pot. Then add clay pebbles or another growing medium around it to hold it in place. Make sure the plant sits upright and feels stable.
6. Set the water level
In the beginning, make sure the water level is high enough for the bottom of the net pot or the roots to stay moist. Once the roots grow longer and reach into the bucket, lower the water level slightly. This gives the roots both water and air, which helps them stay healthy.
Weekly Maintenance That Keeps The System Healthy
A small system does not need constant babysitting, but it does need consistency.
Check these every few days:
- pH
- Water level
- Pump and air stone performance
- Root color and smell
- Overall leaf color and growth
Virginia Tech recommends checking EC and pH two to three times per week in DWC systems. Illinois Extension also advises keeping the solution fresh, monitoring pH, and cleaning the system between crops to prevent algae and salt buildup.
If the roots look white or cream-colored and the plant keeps pushing new growth, you are usually in good shape. If the roots look slimy, brown, or smell off, act fast: clean the system, refresh the nutrient solution, and make sure the bucket is staying dark and well-aerated. A 2026 Frontiers review on recirculating hydroponics highlights how low oxygen conditions can open the door to disease pressure, especially when roots stay stressed. To get better results, it helps to understand how hydroponic fertilizers work.
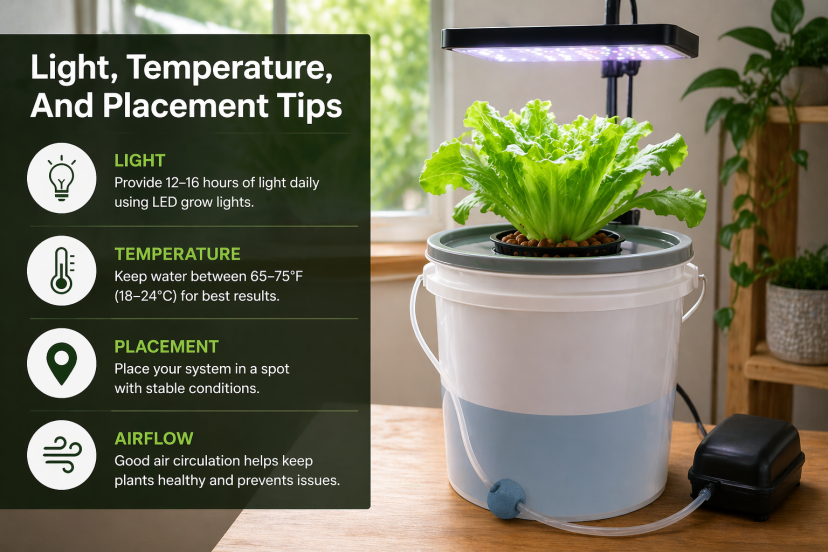
Light, Temperature, And Placement Tips
If your bucket lives outdoors, aim for a spot with stable sun and manageable heat. If it lives indoors, you need a grow light strong enough for edible plants. Illinois Extension notes that leafy greens and herbs do well indoors because they stay compact, but they still need proper light.
Many beginners overlook how important temperature can be. A recent Frontiers review explains that higher nutrient solution temperatures reduce oxygen solubility, which can increase stress on roots. That is one more reason small bucket systems should stay out of blazing hot corners or sealed rooms with stagnant air. Cool, stable conditions usually win.
Conclusion
Building a small DIY hydroponic bucket system is a simple way to start growing fresh plants at home without needing a big setup or a lot of experience. Once you have the right bucket, steady aeration, balanced nutrients, and the proper pH, the system becomes easy to manage. Start with beginner-friendly crops like lettuce or basil, keep an eye on the water, and make small adjustments as you learn. A hydroponic bucket system may look basic, but it can teach you a lot and give you a reliable way to grow healthy plants in a small space.
FAQs
1. What is the best plant for a small hydroponic bucket system?
Lettuce and herbs like basil, mint, and parsley are usually the best first choices because they grow quickly, stay compact, and are widely recommended for beginner DWC systems.
2. Do I need an air pump for a hydroponic bucket system?
For a DWC bucket system, yes. The roots sit in nutrient solution, so you need an air pump and air stone to keep oxygen levels up and the root zone healthy.
3. What pH should my hydroponic bucket system be?
Most home hydroponic crops do well around pH 5.5 to 6.5, and many DWC crops perform especially well near 5.5 to 6.2.
4. Can I grow tomatoes in one bucket?
You can, but tomatoes are not the easiest first crop. They need more light, more support, and more active nutrient management than leafy greens or herbs.
5. How often should I check my hydroponic bucket system?
Check pH, water level, and aeration every few days. As a practical rule, Virginia Tech recommends checking EC and pH two to three times each week in DWC systems.